Chocolate Birthday Cake
This post may contain affiliate links. Read full disclosure.
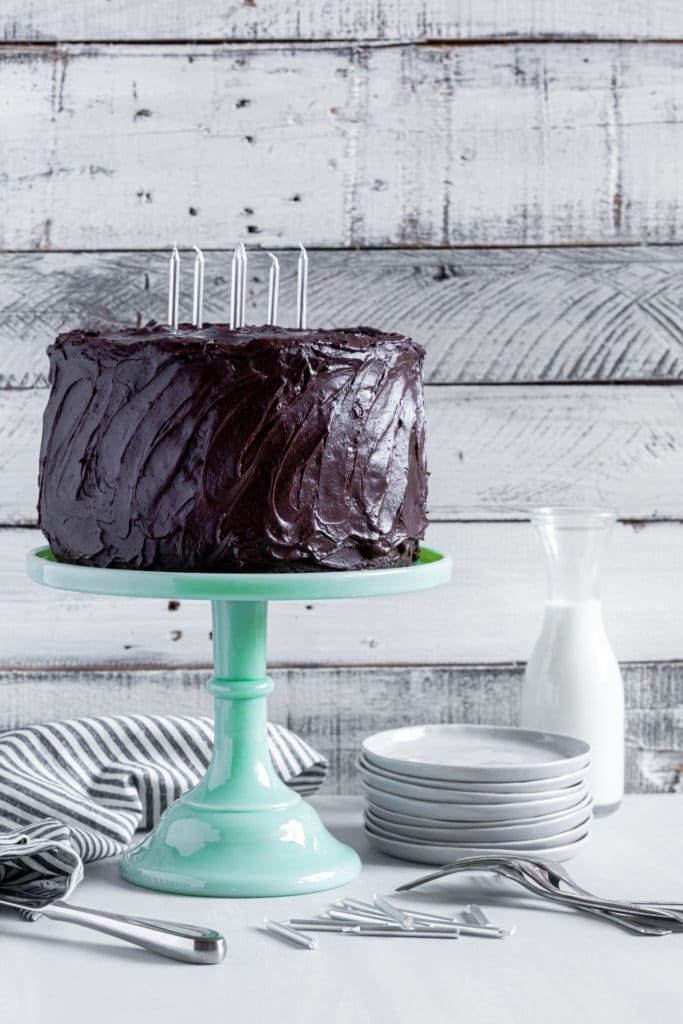
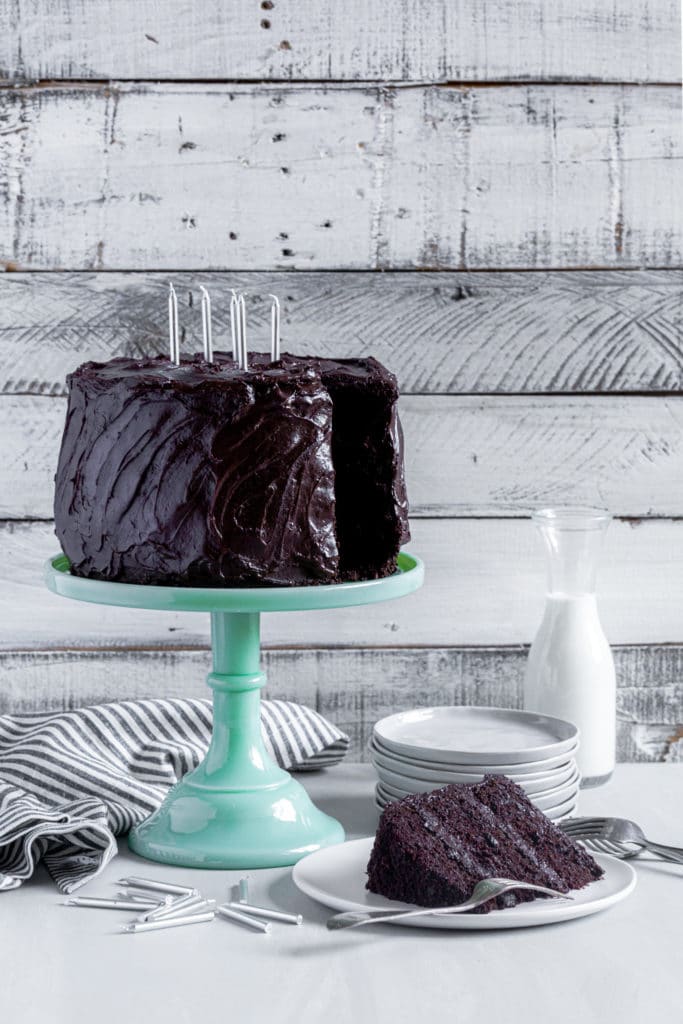
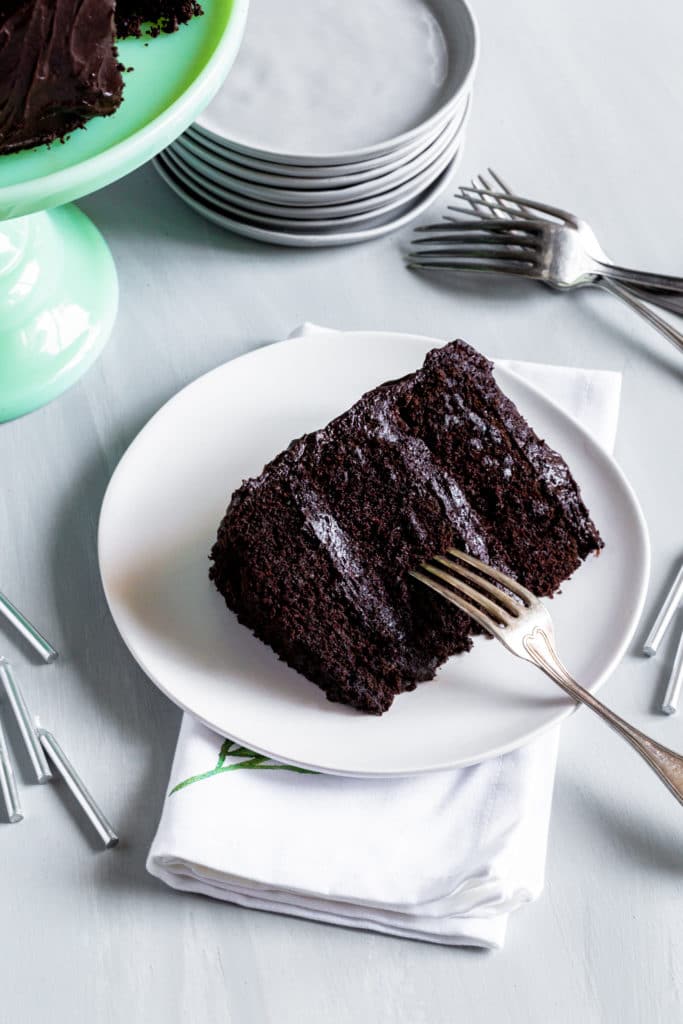
Celebrate life with a chocolate birthday cake that’s completely irresistible! Moist, decadent and delicious, this Matilda chocolate cake was inspired by the movie! The rich chocolate frosting will have you licking the spatula.
About this Chocolate Birthday Cake
Boxed cake mix can’t hold a candle to this homemade Matilda cake! It’s even better than Hershey’s chocolate cake recipe. It comes together with basic refrigerator and pantry items.
A birthday cake like this deserves a deeply-satisfying chocolate frosting. This cream cheese icing does not disappoint. Like my drool-worthy mint brownies, friends are always asking for the recipe.
In a family of chocolate lovers, this is our favorite dessert. It’s featured at parties year round. No birthdays on the horizon? Find an excuse to treat yourself to a yummy cake. Light a candle on top. You deserve all the joy.
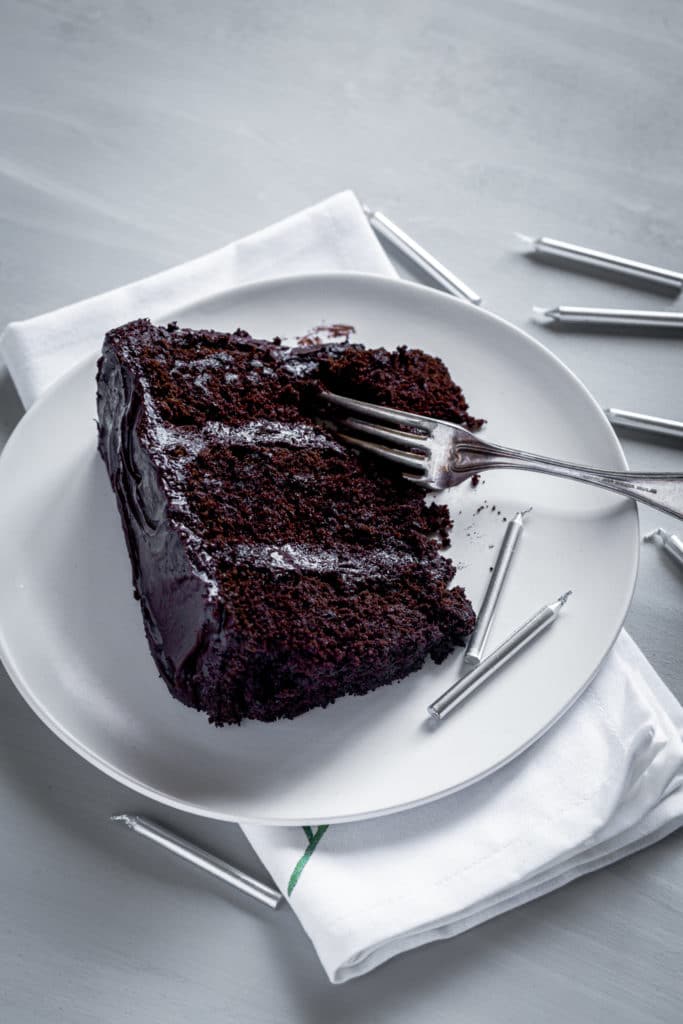
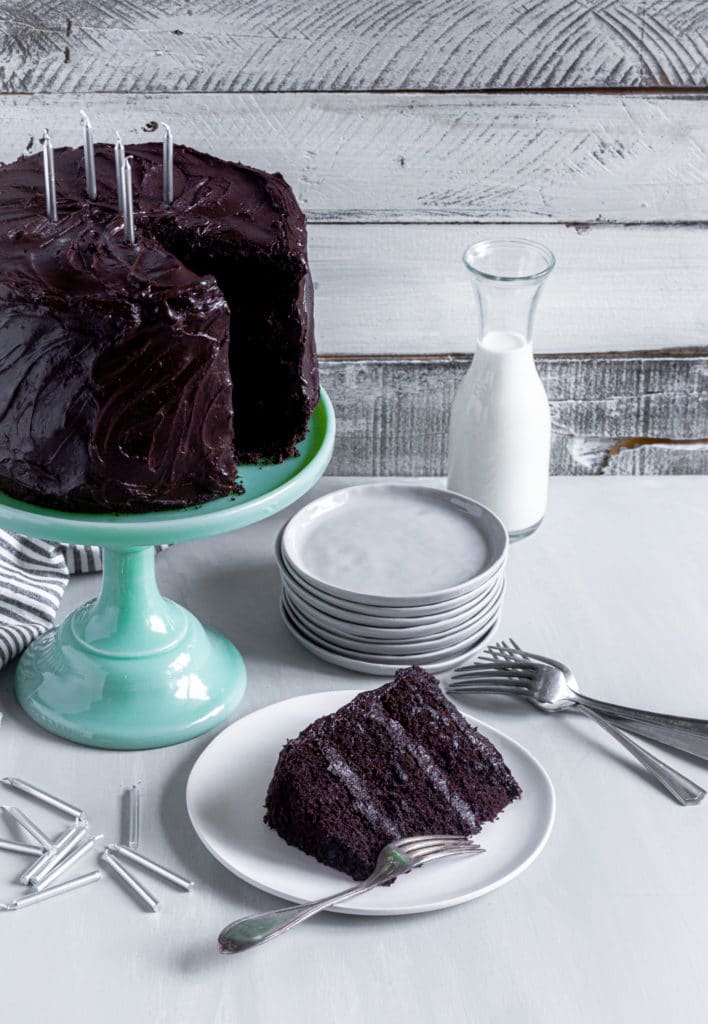
NUMBER OF SERVINGS: This 3-layer cake is perfect for large gatherings. It serves 16 generous portions. If sliced event-style, per this cake server guide, it yields 24 pieces.
Plan Ahead / Make Ahead
Before starting, read the recipe instructions from start to finish. As with all homemade cakes, there will be some down time. The baked cakes will need time to cool in the fridge. The crumb coating will need an hour of chilling.
I recommend baking the layers of cake the day before. Chill them in the fridge overnight. You can go a step further by making the frosting and applying the crumb coating. The final frosting can be done the next day.
🛒 Ingredients
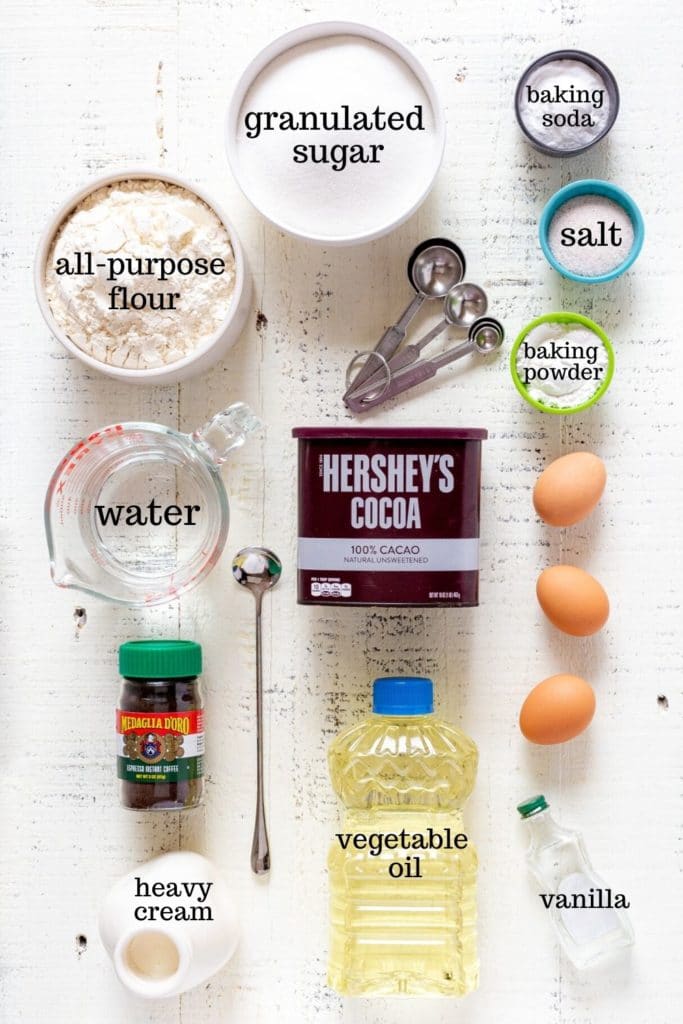
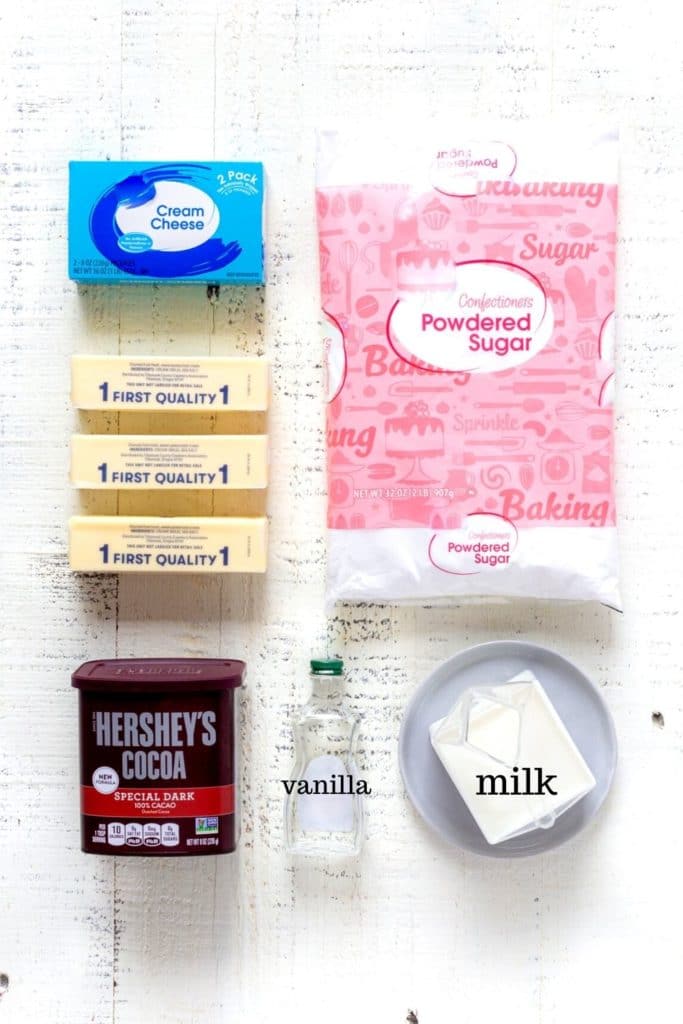
This chocolate birthday cake comes together with just a few refrigerator and pantry items. Most are ingredients you may already have on hand!
For Chocolate Cake
- All-purpose flour
- Granulated sugar
- Hershey’s Cocoa Powder, natural unsweetened
- Baking soda
- Baking powder
- Kosher salt
- Vegetable oil
- Large eggs
- Vanilla extract
- Heavy whipping cream
- Espresso instant coffee granules
- Boiling water
For Chocolate Frosting
- Cream cheese (block-style, not from spreadable tub)
- Butter
- Hershey’s Cocoa Powder, natural unsweetened*
- Vanilla extract
- Powdered sugar
- Whole Milk
- Kosher Salt
*FOR DARKER CHOCOLATE FROSTING: Use Hershey’s Special Dark unsweetened cocoa powder.
How to Make Homemade Liners
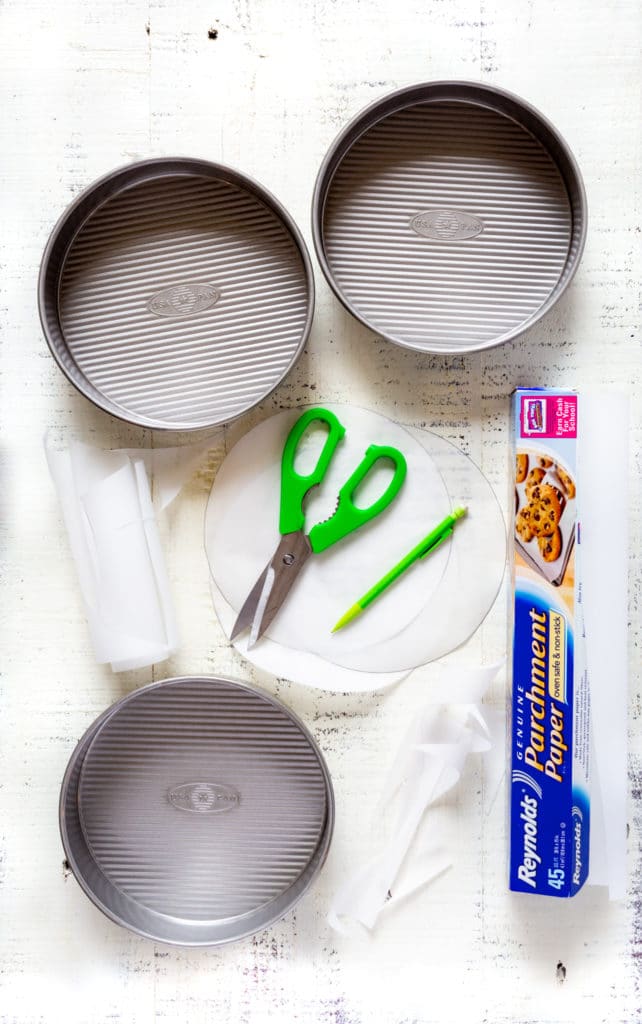
It’s important to line the bottom of cake pans with parchment paper. When pans are prepped correctly, the moist chocolate cakes can be cleanly removed. Use this method even if your pans are non-stick. It’s like having an extra insurance policy for your chocolate birthday cake!
Making parchment paper liners is quick and easy!
- Place the round cake pan on a piece of parchment paper that’s slightly bigger than the pan.
- With a pencil, trace the outer circumference of the pan.
- With scissors, cut out the circle.
How to Prepare Cake Pans
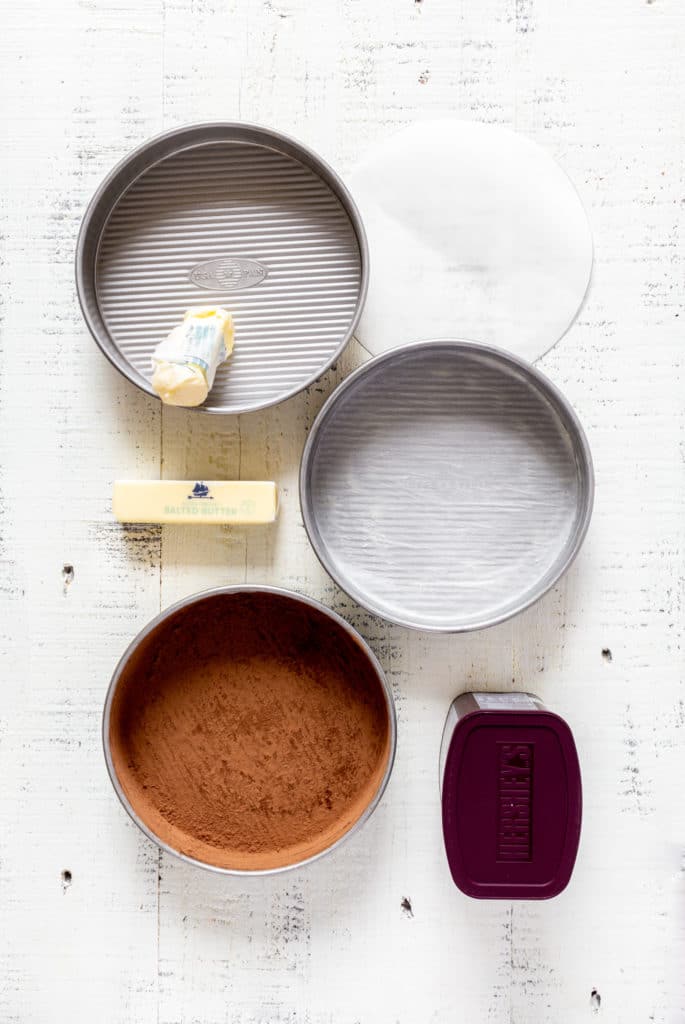
Here’s how to prepare cake pans for this moist chocolate cake recipe.
- Butter the bottom and sides of three 8-inch round cake pans.
- Line each pan with a circle of parchment paper. Smooth it out to remove air bubbles and creases. Butter the paper.
- Dust one cake pan with a few tablespoons of cocoa powder. Shake and rotate the pan until the whole interior is fully coated.
- Turn the pan on its side and tilt it over the second pan. With the heal of your hand, firmly knock out the excess cocoa powder directly into the lined and buttered pan. Repeat the process.
Baking Pan Variations
No round pans for this super moist chocolate cake? No problem. You can still make this easy dessert. Just use the bakeware you have on hand. Below are 2 options that will fit the batter produced by this Matilda cake recipe.
9×13 Rectangular Cake Pan
Pour batter into a prepared rectangular pan. Bake 30 to 35 minutes at 350°F. Cool Matilda chocolate cake before frosting.
Cupcake Pans
This recipe yields 40 cupcakes. Line the wells with cupcake wrappers. Fill each well halfway full, about 3 tablespoons. Do not overfill, as these cupcakes really rise. Bake for approximately 19-20 minutes at 350°F, or until a cake tester inserted into the center of the tallest cupcake comes out clean (or with just a few crumbs attached). Cool completely before frosting.
👉🏻 Important note about frosting: This recipe yields enough frosting to frost 35 of the 40 cupcakes with tall elegant swirls of frosting. Just like cupcakes purchased from a bakery. So there’s not quite enough frosting to cover the entire batch.
📖 Recipe Steps
Make the Chocolate Cake
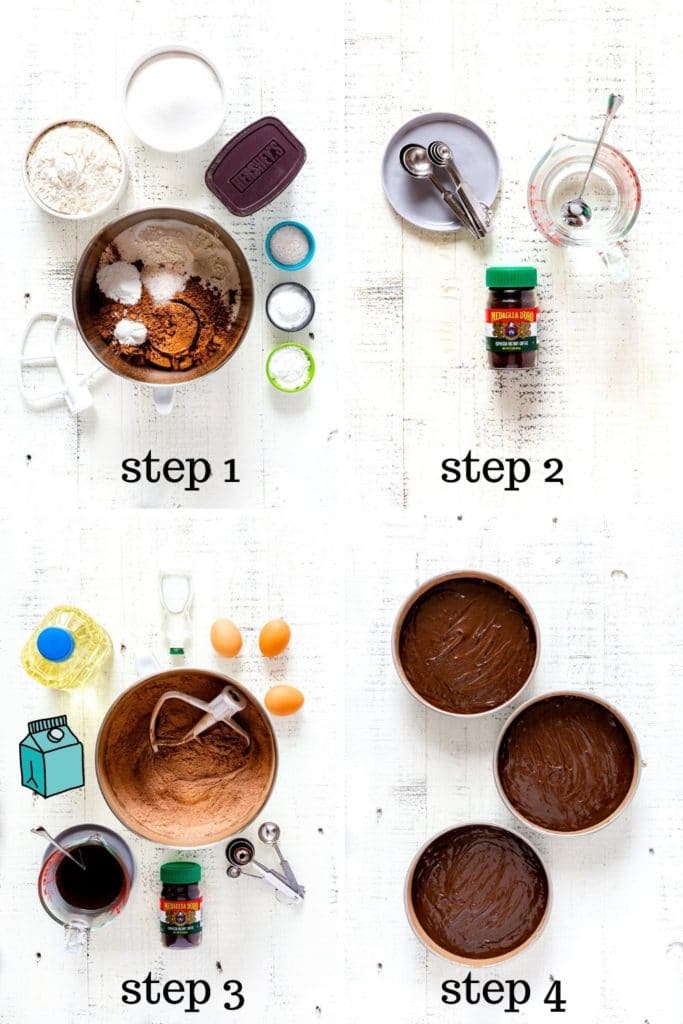
RECIPE PREP: Prepare three round 8-inch cake pans (butter, line and dust with cocoa powder). Adjust oven rack to the center position. Preheat oven to 350°F.
- In the bowl of a stand mixer, add flour, sugar, cocoa powder, baking soda, baking powder, and sea salt. Mix on low.
- In the meantime, stir espresso instant coffee in boiling water. Set it aside.
- With the mixer still on low, add oil, eggs, vanilla, and heavy whipping cream. Blend. Add the hot espresso/water mixture. Mix until smooth.
- Divide batter between the pans. Bake 30 to 35 minutes. Check for doneness by inserting a toothpick into the center of each cake. If it comes out mostly clean, it’s done. Don’t wait until the tester comes out completely dry, or cakes will be over baked. We want tender layers for a super moist chocolate cake.
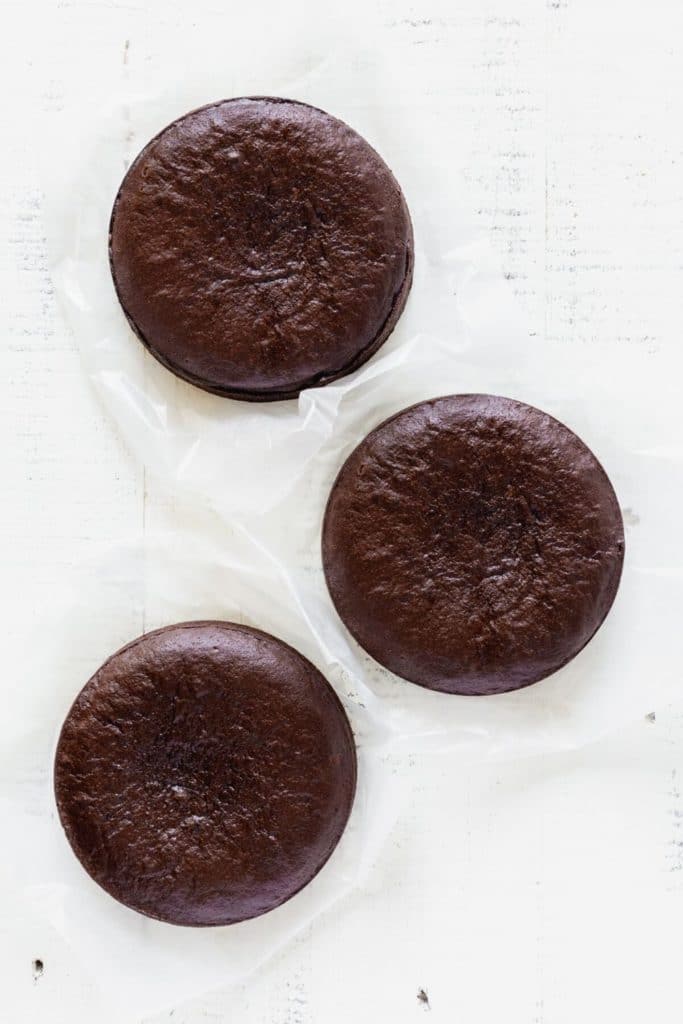
HOW TO COOL THE CAKES: After 10 minutes, remove cakes from their pans. They may slightly deflate in the middle, but that’s okay. Later on we’ll be trimming the tops.
Transfer each cake to a sheet of waxed paper. Let them shed heat on the counter for 15 minutes. Chill in the fridge 2 hours or overnight.
Make Chocolate Cream Cheese Frosting
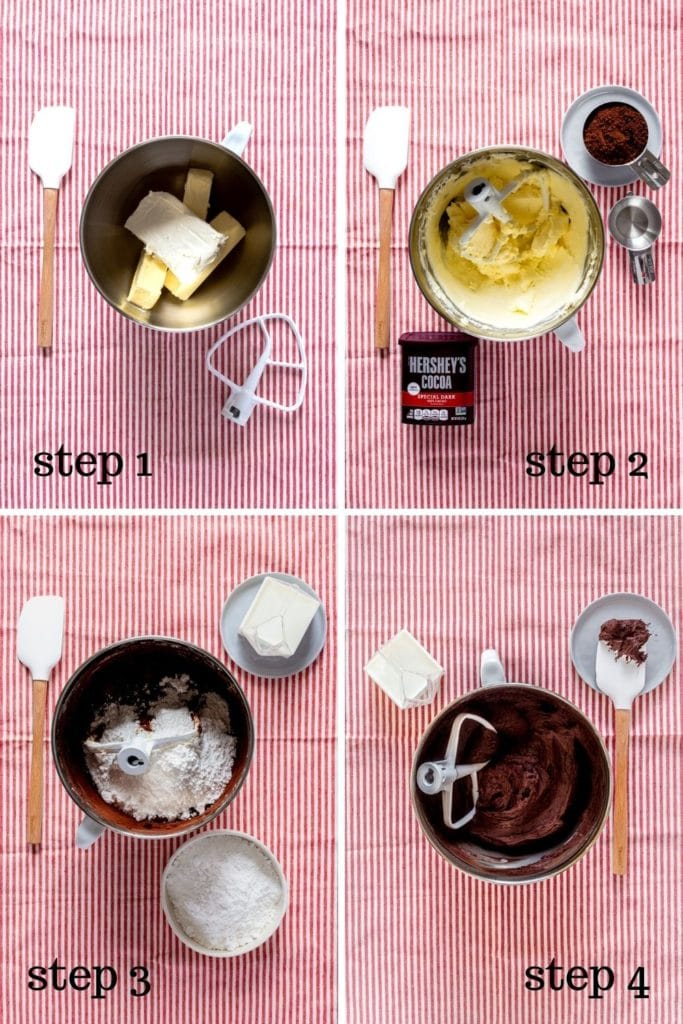
This easy chocolate cake frosting comes together in 15 minutes! But before you begin, make sure all ingredients are at room temperature.
- In the bowl of a stand mixer with paddle attachment, beat the cream cheese and butter together until completely combined and fluffy.
- With mixer on a low-speed setting, add cocoa powder, vanilla extract, and half the milk, and a pinch of salt. Mix until blended.
- Slowly add in powdered sugar, 1/2 cup at a time. During this process, gradually add in more milk until the mixture reaches a desired consistency. For icing a super moist chocolate cake, the frosting must be smooth and easily spreadable.
- Taste the frosting. You might want to add an additional pinch of salt and mix again. [Salt enhances the flavor of chocolate, and tamps down sweetness.]
🔪 How to Trim & Frost a Cake
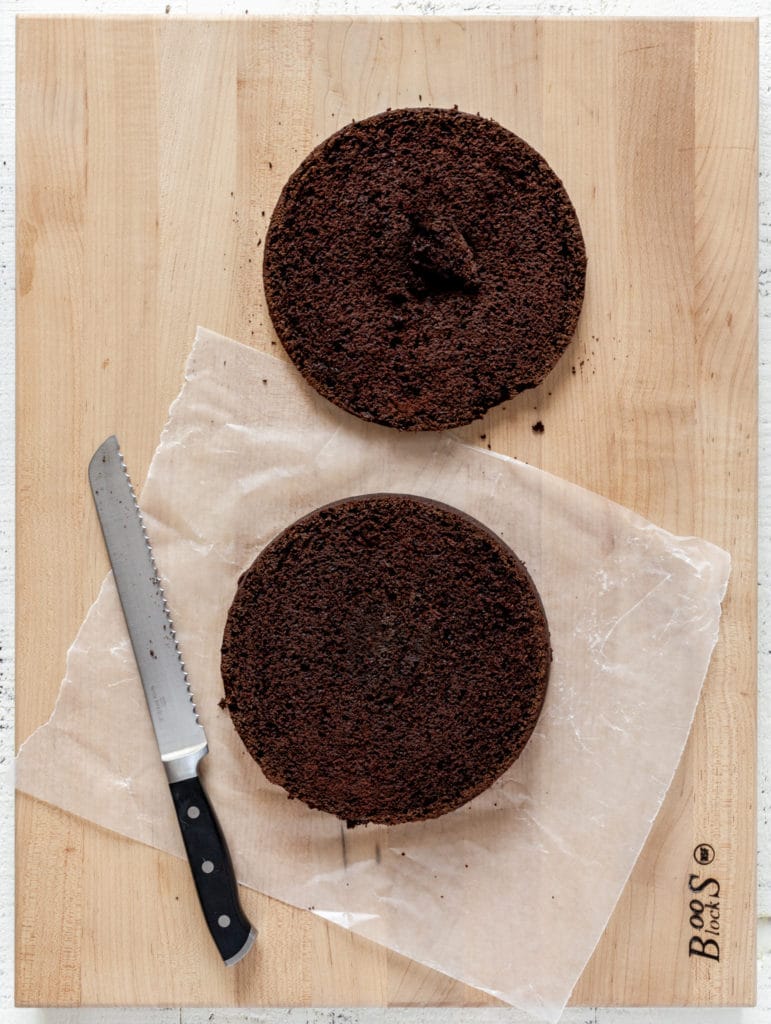
PREP WORK: With a long serrated knife, use a sawing motion to level the top of each cake. The layers of this 3-tier chocolate birthday cake should be the same height, as well as flat and even.
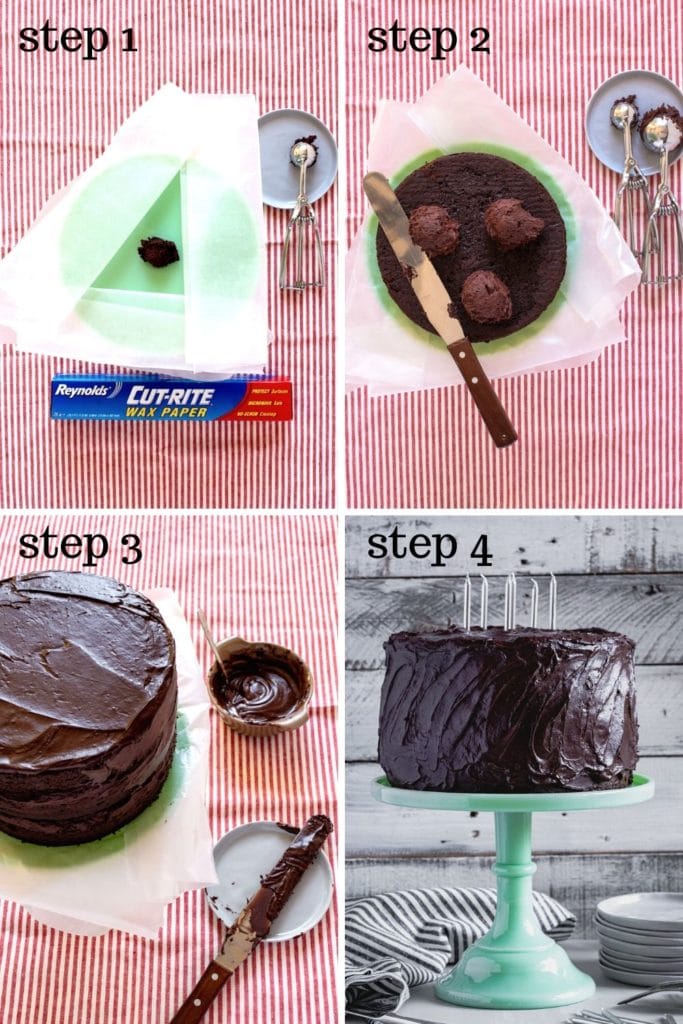
- Lay 3 strips of wax paper along edges of a serving plate, or cardboard cake round that’s 1 to 2 inches wider than the cake. The strips will keep the plate clean from frosting. Plop a dollop of frosting in the center of the plate. This will prevent cake from sliding around.
- Place first layer of cake in the center of plate with cut side facing down. It should sit partially on top of the paper strips. Brush away loose crumbs with a pastry brush. With an icing spatula or knife, spread an even layer of frosting on top, about 1/2 inch thick. Don’t frost the sides! Add second layer, with trimmed side facing down. Apply an even layer of frosting to the top, but not the sides.
- Add third layer. Brush away stray crumbs. Place a large scoop of icing in a small bowl. Thin it out with milk to make it super spreadable. It should be thinner than the rest of the frosting so it can glide right on with no resistance. Ice top and sides of cake with a very thin, even, smooth layer of frosting (1/16 of an inch thick). This is a “crumb coating.” Its job is to lock in the crumbs, preventing them from mixing with the final coat of frosting. Discard remaining icing from the small bowl, as it probably has crumbs. Chill cake in fridge for 1 hour or until coating has set.
- Now it’s time to frost the cake! Apply 1/2 inch of frosting to the top and sides. Remove and discard protective paper strips. Your chocolate birthday cake is ready to enjoy!
👩🏻🍳 Recipe FAQ
- WHY COOL THE LAYERS OF CAKE FOR 2 HOURS? It takes 2 hours for the middle of a cake to cool. If you apply frosting before cooling is complete, you’re in for a mess. As heat rises from the center of each layer, the icing will start to melt.
- TIP FOR MAKING THE BEST CHOCOLATE CAKE: Use high-quality baking powder. This is a make or break situation! I recommend either Hershey’s or Ghirardelli cocoa powder.
- WHY HOT ESPRESSO FOR THIS RECIPE? Coffee greatly enhances the chocolate flavor. It takes things to the next level. Additionally, the hot liquid helps dissolve the cocoa, reducing lumps in the batter.
- WHY IS THIS CALLED A MATILDA CHOCOLATE CAKE? In the movie Matilda, there’s an iconic scene where Miss Trunchbull forces Bruce Bogtrotter to eat a giant chocolate birthday cake as a punishment. This super moist chocolate cake is just like the one in the movie!
- WHAT TO DO WITH LEFTOVER CAKE TRIMMINGS? After trimming the top of a cake, save and freeze the leftover pieces. Use them to make cake pops.
- HOW TO MAKE GLUTEN-FREE CHOCOLATE CAKE: Cup for cup, substitute a gluten-free flour blend for the all-purpose flour.
- HOW TO MAKE A DAIRY-FREE CHOCOLATE CAKE: Grease the cake pans with cooking spray. Instead of heavy whipping cream, use soy milk, coconut milk, or almond milk. For the frosting, use a dairy-free option.
- HOW TO MAKE AN EGGLESS CHOCOLATE CAKE: For each egg, substitute 1/4 cup sour cream, OR 1/4 cup plain yogurt, OR 1/4 cup smashed bananas, OR 1/4 cup applesauce.
- HOW LONG DOES CHOCOLATE CAKE LAST? When refrigerated, your frosted cake will stay fresh for 3 to 4 days. If the unfrosted layers are wrapped separately and frozen, they’ll freeze well for up to 3 months.
Popular Chocolate Desserts
If you loved this moist chocolate cake, you’ll go crazy over these desserts too! They’re ideal for parties all year round.
- Chocolate Pudding Dessert
- Chocolate Mousse Pie
- Mint Chocolate Chip Cookies
- Chocolate Crinkle Cookies
- Biscotti with Chocolate
Rate This Recipe ⭐️⭐️⭐️⭐️⭐️
Friends and family say this is the best chocolate birthday cake recipe! If you agree, give this Matilda cake a 5-star rating in the comments.

Chocolate Birthday Cake
- Total Time: 45 Minutes
- Yield: 16 Slices 1x
Description
This decadent, chocolate birthday cake is rich and moist with the perfect crumb. It features a luxurious chocolate-cream-cheese frosting. Enjoy this Matilda cake any time of year, or use the cake batter and frosting to make the best chocolate cupcakes.
Ingredients
CHOCOLATE CAKE
- 3 1/2 cups all-purpose flour
- 3 cups granulated sugar
- 1 1/2 cups Hershey’s Special Dark Cocoa Powder*
- 1 tablespoon baking soda
- 1 1/2 teaspoons baking powder
- 2 teaspoons kosher salt
- 1/2 cup vegetable oil
- 3 large eggs
- 1 1/2 tablespoons vanilla extract
- 1 cup heavy whipping cream
- 1 3/4 teaspoons espresso instant coffee
- 1 cup boiling water
CHOCOLATE CREAM CHEESE FROSTING
- 8 oz cream cheese (block-style, not from spreadable tub), softened
- 3 sticks butter (1 1/2 cups), softened
- 1 1/2 cups Hershey’s Special Dark Cocoa Powder*
- 1 1/2 tablespoons vanilla extract
- 1 (2-pound) bag powdered sugar – about 7 cups
- 1/3 cup milk, or more if needed
- 2 pinches kosher salt, or to taste
* 👉🏻 You’ll need to purchase 2 (8-ounce) containers of Hershey’s Special Dark Cocoa in order to have enough of this ingredient for both the cake and the frosting.
Instructions
CHOCOLATE CAKE
RECIPE PREP: Prepare three 8-inch round cake pans (see recipe notes below). Preheat oven to 350°F.
- In the bowl of a stand mixer, add flour, sugar, cocoa powder, baking soda, baking powder, and sea salt. Mix on a low setting.
- In the meantime, prep the coffee: add espresso instant coffee to boiling water. Set it aside.
- With the mixer still on low, add vegetable oil, eggs, vanilla extract, and heavy whipping cream. Blend. Add the hot espresso/water mixture. Mix until smooth.
- Divide batter between the pans. Bake 30 to 35 minutes. Check for doneness by inserting a toothpick into the center of each cake. If it comes out mostly clean, it’s done. Don’t wait until the tester comes out completely dry, or the cakes will be over baked. We’re aiming for tender moist layers.
HOW TO COOL THE CAKES: After 10 minutes, remove the cakes from their pans. They may slightly deflate in the middle, but that’s okay. We’ll be trimming them later. Transfer each cake to a sheet of waxed paper. Let them shed heat on the counter for 15 minutes. Chill in the fridge 2 hours or overnight.
CHOCOLATE FROSTING
- In the bowl of a stand mixer with paddle attachment, beat cream cheese and butter together.
- With your mixer on a low-speed setting, add cocoa powder, vanilla extract, a pinch of salt and half the milk. Mix until blended.
- Slowly add in powdered sugar, 1/2 cup at a time. During this process, gradually add in more milk until the mixture reaches a desired consistency. Do a taste test. Add another pinch of salt if needed, and mix to combine. [Salt enhances the flavor of chocolate, and also tamps down the sweetness of the frosting.] For icing a chocolate cake, we want the frosting smooth and easily spreadable.
HOW TO FROST THE CAKE
PREP WORK: Lay 3 to 4 strips of wax paper along edges of a serving plate, or cardboard cake round that’s 1 to 2 inches wider than the cake. The strips will keep the plate clean from frosting. Plop a dollop of frosting in the center of the plate. This will prevent cake from sliding around while frosted.
- With a long serrated knife, use a sawing motion to level the top of each cake. Layers should be the same height, as well as flat and even.
- Place first layer of cake in the center of plate with cut side facing down. It should sit partially on top of the paper strips. Brush away loose crumbs with a pastry brush. With an icing spatula or knife, spread an even layer of frosting on top, about 1/2 inch thick. Don’t frost the sides! Add second layer, with trimmed side facing down. Apply an even layer of frosting to the top, but not the sides.
- Add third layer. Brush away stray crumbs. Place a large scoop of icing in a small bowl. Thin it out with milk to make it super spreadable. It should be thinner than the rest of the frosting so it can glide right on with no resistance. Ice top and sides of cake with a very thin, even, smooth layer of frosting (1/16 of an inch thick). This is a “crumb coating.” Its job is to lock in the crumbs, preventing them from mixing with the final coat of frosting. Discard remaining icing from the small bowl, as it probably has crumbs. Chill cake in fridge for 1 hour or until coating has set.
- Now it’s time to frost the cake! Apply 1/2 inch of frosting to the top and sides. Remove and discard protective paper strips. Your chocolate birthday cake is ready to enjoy!
Notes
How to prepare the cake pans: Butter the bottom and sides of three 8-inch round cake pans. Line each pan with a circle of parchment paper. Smooth it out to remove air bubbles and creases. Butter the paper. Dust one cake pan with a few tablespoons of cocoa powder. Shake and rotate the pan until the whole interior is fully coated. Turn the pan on its side and tilt it over the second pan. With the heal of your hand, firmly knock out the excess cocoa powder directly into the lined and buttered pan. Repeat the process.
Cupcakes: This cake recipe yields enough batter for 40 cupcakes. Line the wells of your cupcake pans with cupcake liners. Fill each well 1/2 full (3 tablespoons). Do not overfill – these cakes really rise! Bake at 350°F for about 19-20 minutes or until a cake tester inserted into the center of the tallest cupcakes come out clean or with just a few crumbs. This frosting recipe yields enough to frost 35 of the 40 cupcakes with tall elegant swirls, just like those from a bakery.
- Prep Time: 15 Minutes + 3 Hours in Fridge
- Cook Time: 30 Minutes
- Category: Dessert
- Method: Oven
- Cuisine: American

CHOCOLATE BIRTHDAY CAKE > JOIN THE CONVERSATION
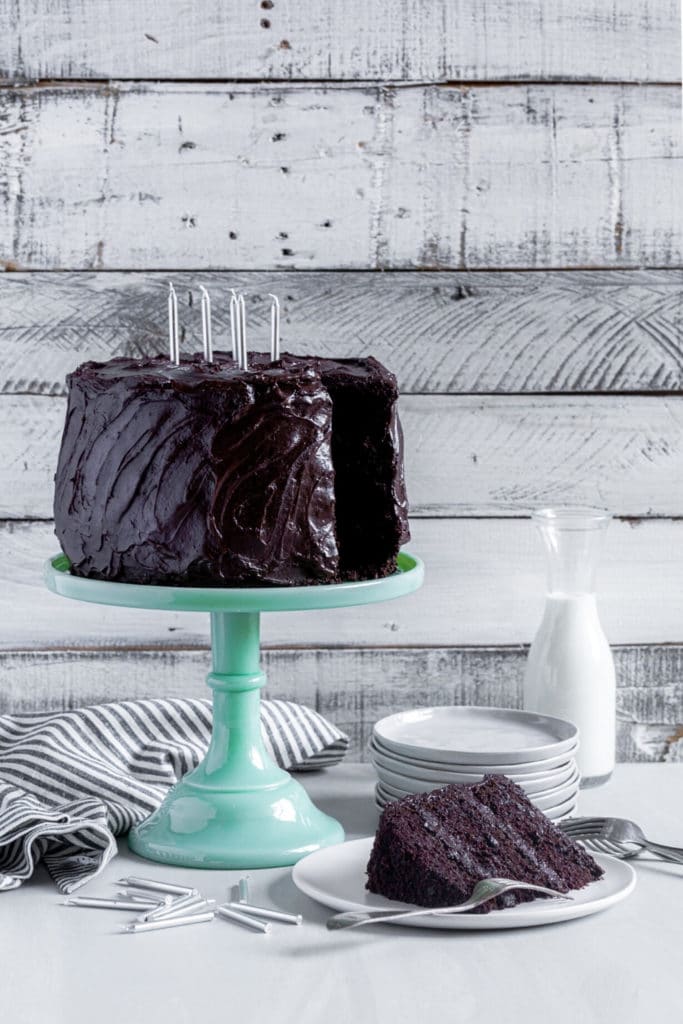
How do you serve a super moist chocolate cake? I like mine presented on a pedestal cake stand with silver birthday candles. I pair the slices with vanilla ice cream. Share your thoughts on this Matilda cake in the comments.











Made this as requested by my now 10 y/o granddaughter for her birthday. Everyone loved it. But, I’m not sure what I did wrong…I followed the recipe and the cake had great flavor but it was very dense; more like a brownie. Did I over mix? Over bake? Help!
The frosting was to die for though; I used the dark cocoa as suggested.
Will try again as it is perfect for special celebrations for my chocolate loving family!
Hello Stacey. Thank you for returning to ask this question! There are actually several things that might have caused this: 1. Baking powder or baking soda is not fresh. 2. Too much flour. Alway use the fluff, sprinkle, swipe method. Fluff up the flour inside the bag with a spoon. By the spoonful, sprinkle flour into the measuring cup until it’s overflowing. Run a knife over the measuring cup to even off the top and swipe away the excess. 3. For baked goods, overmixing is often the culprit. Mix ingredients until just blended. 4. The oven should be preheated before baking the cakes. Even if your oven indicates that it’s reached the desired temperature, wait an additional 20 minutes before baking just to be sure. You may also want to check the temperature of your oven to see if it’s running cold. // Happy 10th birthday to your granddaughter! From my kitchen to yours, I send good wishes for great baking days and many delicious meals! – Denay
This chocolate cake has killed me with its amazing taste! Thanks for the recipe!
Aidan, I’m so happy to hear you’ve enjoyed this recipe! It’s our family’s favorite chocolate cake.
Wow this cake looks so rich and chocolatey. Just how I like my cake!! Can’t wait to make this for my hubby’s birthday next month.
This cake is a chocolate fanatic’s dream! It is so rich and delicious! I already can’t wait to make it again!
This is the best cake anyone would ever make for a birthday! My husbands birthday is tomorrow. I am making this. Thanks!
My kids always love chocolate birthday cake! I love how you added the espresso in it!
This recipe should be illegal! I seriously ate two huge slices and wanted another one but thankfully my willpower kicked in. It’s the prefect chocolately birthday cake!
Hands down the best chocolate cake ever!!