Graham Cracker Crust
This post may contain affiliate links. Read full disclosure.

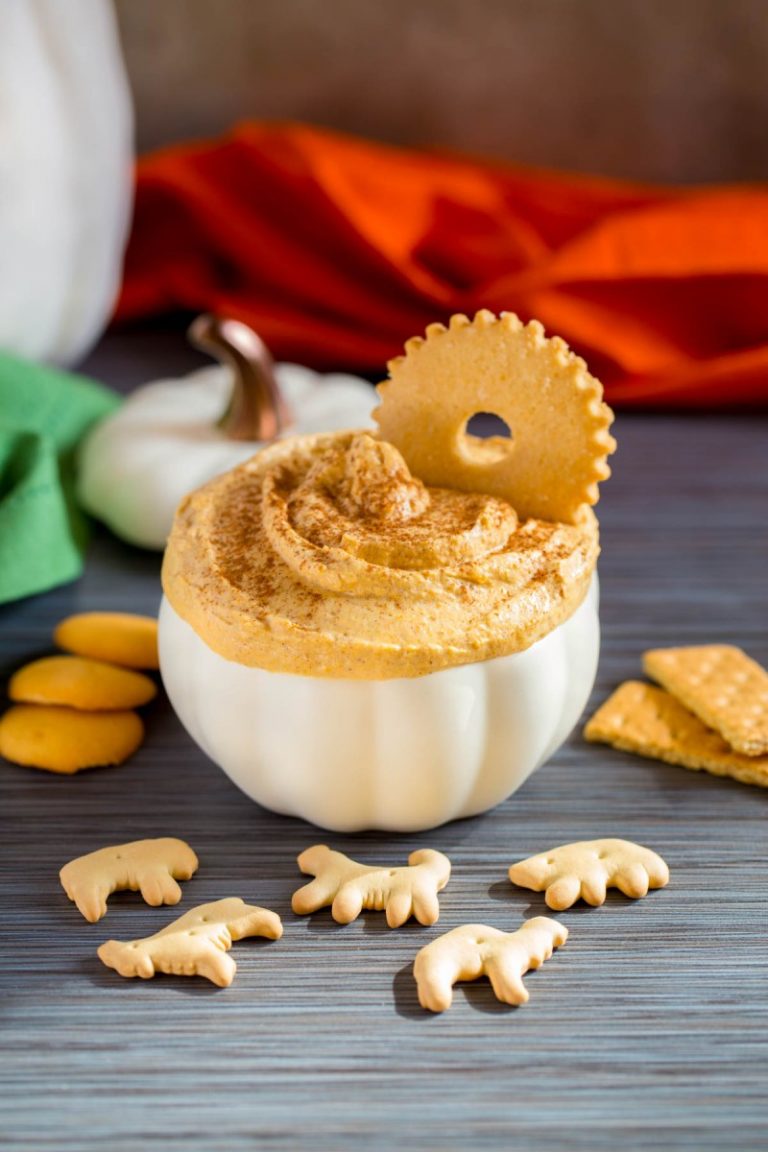
This graham cracker crust is simple to make in just 10 minutes, and tastes so much better than store-bought. It’s so versatile – perfect for no-bake pies, bars, cheesecakes, and oven-baked desserts. For more sweet options, try our Oreo Cookie Crust, shortbread crust, or a nostalgic vanilla wafer crust. You can’t go wrong with any of these choices. They’re so delicious!

Homemade Pie Crust VS Store-Bought
Refrigerated pie crusts like those for baked fruit pies, are convenient to use in a pinch. Although they lack that special homemade pie crust taste, they’re still quite good. Just don’t tell Grandma it’s not from scratch!
Store-bought crusts have a different texture, and may sometimes have a stale taste. Luckily, it’s easy to assemble this fresh-tasting, graham cracker crust in no time flat! It’s a classic recipe all bakers should have in their recipe arsenal. You can pull this together with great results.
👉🏻 When making quiche, try my very popular flaky quiche crust recipe!

🛒 Ingredients
Make the best no-bake graham cracker crust with just three basic ingredients! Salted butter is preferred. But if you only have unsalted butter, no problem. After it’s melted, stir in a pinch or two of salt.
Here’s what you’ll need for the perfect pie crust:
- Graham crackers
- Granulated sugar
- Butter
KITCHEN TIP: No granulated sugar? No problem. Use brown sugar instead. Your crust will have a light and delightful caramel flavor.
EXCITING DESSERTS TO MAKE ASAP!
If you love easy desserts, like this no-bake graham cracker crust, you’ll enjoy making and eating these too:

GRAHAM CRACKER CRUST RECIPE
No food processor? No problem. Use a blender. Another option: put graham crackers inside a large zip-top bag. Protect your work surface with a kitchen towel.
Crush the crackers into crumbs with a rolling pin, the back of a measuring cup or small pot, or with the smooth side of a meat mallet.
- STEP 1: Add graham crackers to the bowl of a food processor.
- STEP 2: Pulse to reduce crackers to fine crumbs. This takes less than a minute to do!
- STEP 3: Transfer crumbs to a large mixing bowl. Add sugar. Stir well to combine. Pour melted butter over the mixture.
- STEP 4: Stir until fully incorporated. Use a spoon or spatula to break up any lumps. The mixture will be coarse and grainy.

HOW TO MAKE GRAHAM CRACKER CRUST
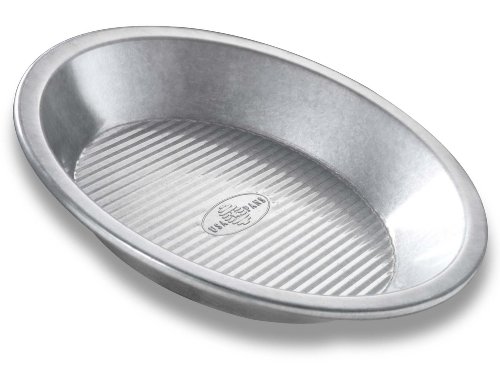
Friends often ask about my choice of pie plates. The one I highly recommend is shown in my images. It’s a 9-inch metal pie pan made in the USA. Crusts baked in these pans are absolutely beautiful.
- STEP 1: Lightly coat the pie pan with cooking spray, even if it’s a non-stick pie plate. With a paper towel, evenly disburse the cooking spray over the surface, wiping off any excess oil. Later, this will help the slices of pie to lift out easily!
- STEP 2: With a spatula and the back of a 1/3 measuring cup, press graham cracker crumb mix up the sides of the pan. The crust should be very compact, with crumbs tightly in place. Always form the edges first. This great kitchen tip will make the process easier!
- STEP 3: Transfer remaining crumbs to the pan. Press down, compressing the crumbs, to create the bottom of the crust.
- STEP 4: Place the pie pan with crust into the freezer. Chill for 35 minutes or until the pie crust is firm and stable. An alternate method is refrigerating the crust for 1-2 hours, or until firm. If making the crust ahead of time, it can remain in the refrigerator for up to 3 days or in the freezer for up to 1 month.

RECIPE TIPS FOR SUCCESS
- FREEZE THE CRUST FOR NO-BAKE DESSERTS: After assembling the crust, chill until firm. Add the filling, any topping, and serve. This is a quick easy option for a no-bake pie crust!
- HOW TO MAKE THE CRUST STURDIER: Par-bake the graham cracker crust in a 350°F oven for 7-8 minutes, or until golden brown. This helps hold the crumbs together. The crust will be crispy, crunchy, and much less crumbly!
- HOW TO PREVENT A SOGGY GRAHAM CRACKER CRUST: Place graham cracker crust in freezer or fridge until firm. Brush cold crust with egg wash (1 egg white and 1 tablespoon water whisked together). Bake pie crust at 350°F for 3-5 minutes to dry. If a sturdier crust is desired, bake a few minutes longer. The dried egg wash creates a protective moisture barrier between the crust and filling. Cool the crust before adding the filling. Proceed with recipe directions for the specific dessert you’re making.
- WHAT TO DO IF EDGES FALL DOWN DURING BAKING: While the crust is still hot, use the back of a measuring cup to fix and reshape the edges. Allow the crust to cool.
- HOW TO REPAIR CRACKS IN A BAKED CRUST: Drizzle honey or corn syrup on the areas that need to be repaired. Gently press it in to seal the cracks.

FAQ FOR PIE CRUST RECIPE
No graham crackers on hand? No problem. Try biscoff cookies, vanilla wafers, gingersnaps, or any crisp cookies. You can even use crushed waffle cones to make this crust. If residing outside the U.S., digestive biscuits are a fabulous option!
Use store-bought graham cracker crumbs. At the market, look for this product near the graham crackers or in the baking aisle.
Store a baked crust at cool room temperature. Store an unbaked crust in the refrigerator for up to 3 days, or freeze for up to 1 month.
When cutting desserts with a graham cracker crust, use a serrated bread knife. These traditional crusts are crumbly by nature, but a serrated knife will make a cleaner cut.

I WANT WHAT SHE HAS
Beautiful cooking tools bring so much happiness to the kitchen! They make meal prep a joyful experience.
Did you see something here that you’d like to own? Below are affiliate links for purchasing the items on Amazon.
- BOOS BLOCKS – XL Board
- MIXING BOWLS
- METAL PIE PAN – 9-inch
- GINGHAM NAPKINS BLUE/WHITE
- RECIPE BOX – Vintage style
- RECIPE CARDS – Adorable!

Rate This Recipe ⭐️⭐️⭐️⭐️⭐️
Family and friends say this is the best no-bake graham cracker crust! If you agree, give this delicious recipe a 5-star rating in the comments!


Graham Cracker Crust
- Total Time: 18 Minutes + Cooling Time
- Yield: 9-inch Pie Crust 1x
Description
Assemble a beautiful, buttery, graham cracker crust with just 3 ingredients! Use this delicious crust for a variety of no-bake desserts, cheesecakes, bars, and pies.
Ingredients
- 1 3/4 cups graham cracker crumbs (12 full-sheet graham crackers finely crushed)
- 1/3 cup granulated sugar
- 8 tablespoons (1 stick) butter, melted
Instructions
THE PERFECT RECIPE FOR A 9-INCH PIE PAN
- In a large bowl, mix graham cracker crumbs and sugar together. Add melted butter. Mix until fully combined. Break up any lumps with a spoon or spatula. The final mixture will be thick and crumbly.
- Lightly spray pie pan with cooking spray. With a paper towel, wipe the pan to evenly disburse the spray, and to remove any excess oil. With a spatula and the back of a 1/3 measuring cup, press some of the crumb mixture onto the sides of the pan. Always form the edges first! The crust should be very compact, with the crumbs tightly in place. Add remaining crumb mixture to the pan. Press down firmly to compress and form the bottom of the crust.
- For no-bake desserts, chill the crust in the freezer for 35 minutes, or in the refrigerator for 1-2 hours until firm. For baked pies, pre-bake the crust according to recipe instructions.


Notes
- FREEZE THE CRUST FOR NO-BAKE DESSERTS: After assembling the crust, chill until firm. Add the filling, any topping, and serve. This is a quick easy option for a no-bake pie crust!
- HOW TO MAKE THE CRUST STURDIER: Par-bake the graham cracker crust in a 350°F oven for 7-8 minutes, or until golden brown. This helps hold the crumbs together. The crust will be crispy, crunchy, and much less crumbly!
- HOW TO PREVENT A SOGGY GRAHAM CRACKER CRUST: Place graham cracker crust in freezer or fridge until firm. Brush cold crust with egg wash (beat 1 egg white with 1 tablespoon water). Bake pie crust at 350°F for 3-5 minutes to dry. If a sturdier crust is desired, bake a few minutes longer. The dried egg wash creates a protective moisture barrier between the crust and filling. Cool the crust before adding the filling. Proceed with recipe directions for the specific dessert you’re making.
- WHAT TO DO IF EDGES FALL DOWN DURING BAKING: While the crust is still hot, use the back of a measuring cup to fix and reshape the edges. Allow the crust to cool.
- MORE INFO ABOUT THIS RECIPE: Further details are included in the body of the post, along with step-by-step recipe images.
- Prep Time: 10 Minutes + Cooling Time
- Cook Time: 8 Minutes
- Category: Desserts
- Method: No-Bake
- Cuisine: American
GRAHAM CRACKER CRUST > JOIN THE CONVERSATION
Do you love how easy it is to assemble a graham cracker pie crust? What type of dessert will you make with this crust? What’s your favorite type of filling? Share your thoughts below!


How do i change the recipe for a 9inch crust into a
10 inch deep pie dish pie?
My crust came out perfectly after this recipe! Will definitely be using again ;)
This crust is fabulous! So easy and scrumptious! I make this one often!
Easy to make and works great every time!
This is SO much better than the store-bought crusts. It’s definitely worth the little bit of extra time to make your own. Will make again!
This is SO much better than the store-bought crusts. It’s definitely worth the little bit of extra time to make your own.
Love it! A homemade graham cracker crust is 1,000 times better than store bought.
We do the same thing but in the UK our equivalent is Digestive biscuits. It makes an excellent crust. Some nice tips there too.