Chocolate Mousse Pie
This post may contain affiliate links. Read full disclosure.
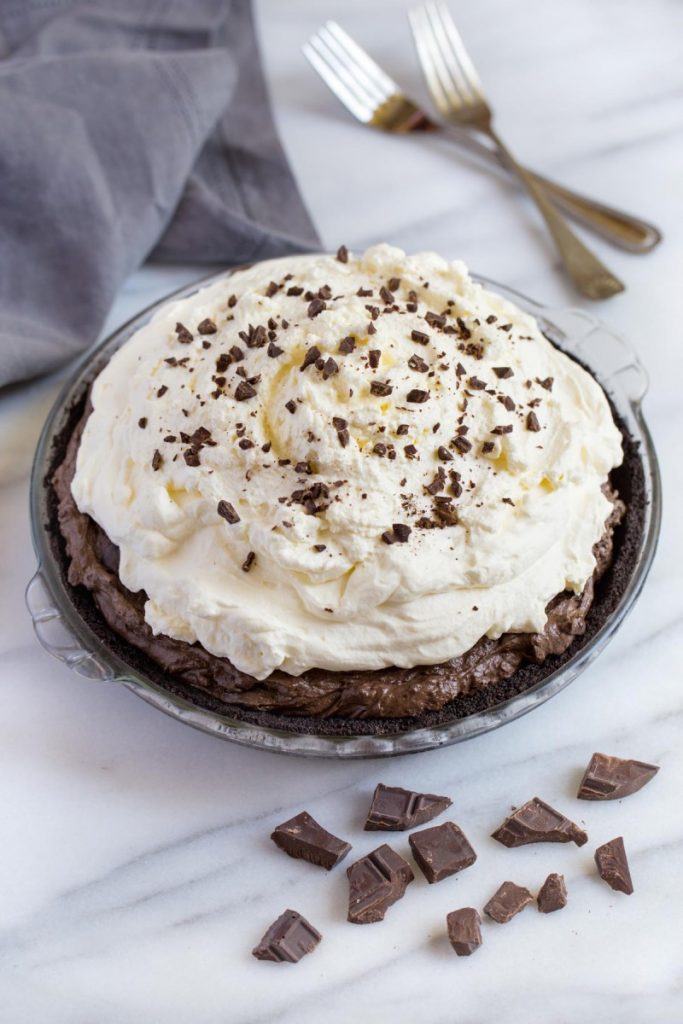
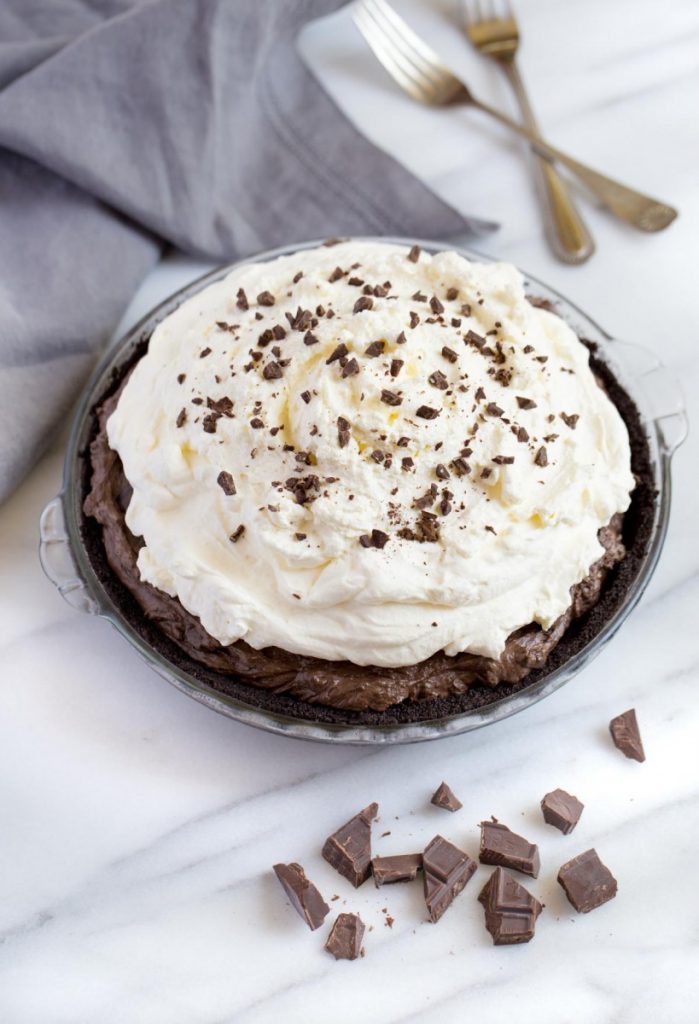
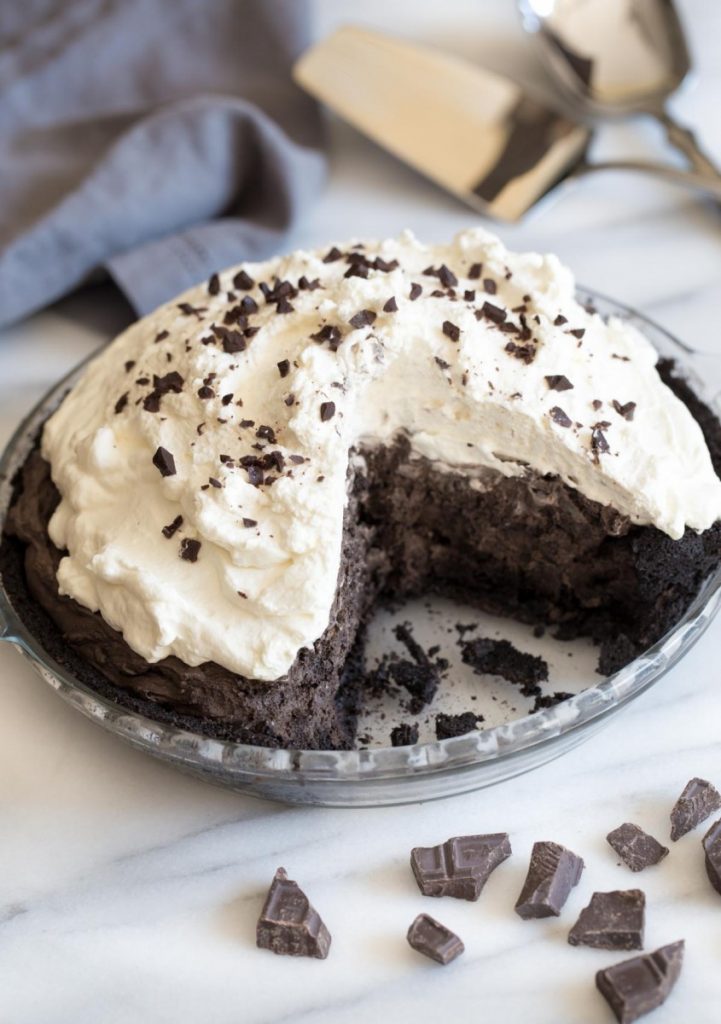
When it comes to scrumptious desserts, my husband loves a good chocolate mousse pie! It’s a fluffier version of Marie Callender’s famous chocolate satin pie, but just as decadent. The chocolate mousse pie recipe I’m sharing with you today has a delicious Oreo cookie crust. It’s filled with a glorious chocolate mousse and topped with homemade whipped cream and a sprinkling of chopped semi-sweet chocolate. Mmmm…
Want to Save This Recipe?
Enter your email below and we’ll send the recipe straight to your inbox! 👩🏻🍳 Plus you’ll receive a few new recipes weekly.
* By submitting this form, you consent to receive emails from Confetti and Bliss.
Many chocolate mousse pie recipes call for eggs, use of a double boiler, and a candy thermometer. My recipe doesn’t need any of that! So there’s no concern about having raw eggs in a no-bake chocolate filling. And you won’t even need a separate recipe to create chocolate shavings as a garnish. You’ll love that this chocolate mousse pie is down-home simple and easy to make. I’m so excited to share this with you – so let’s get started.
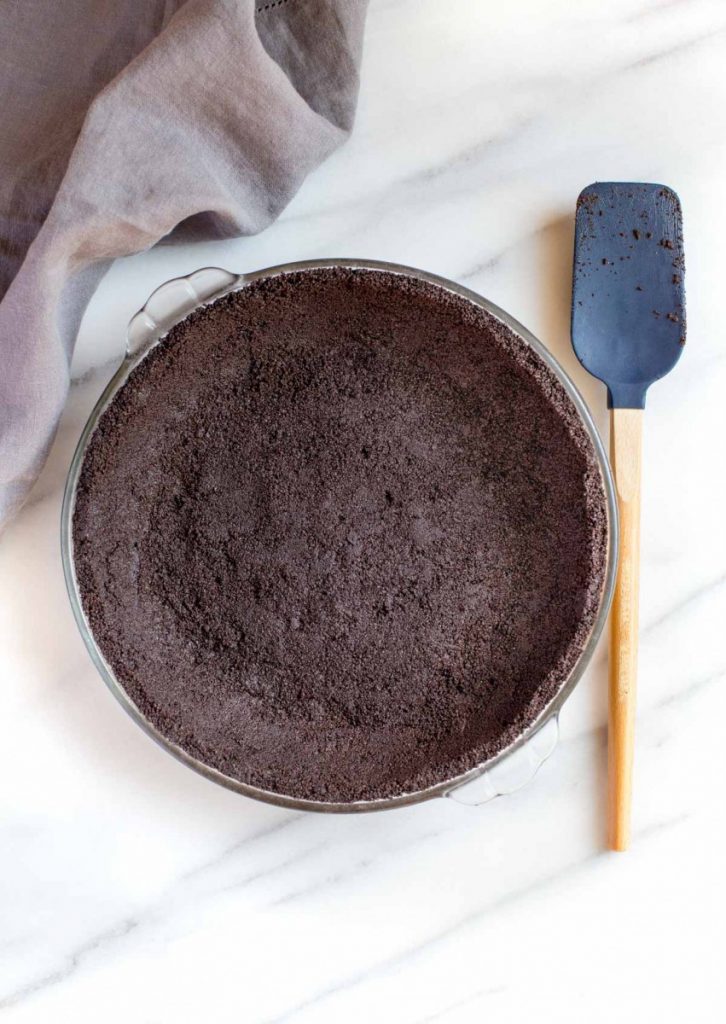
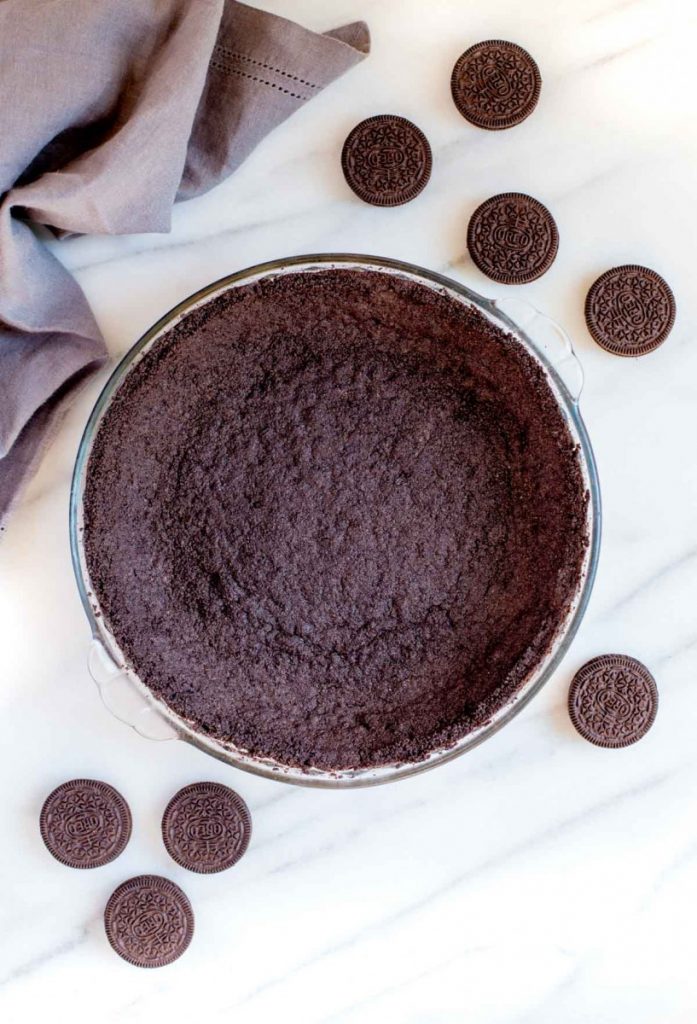
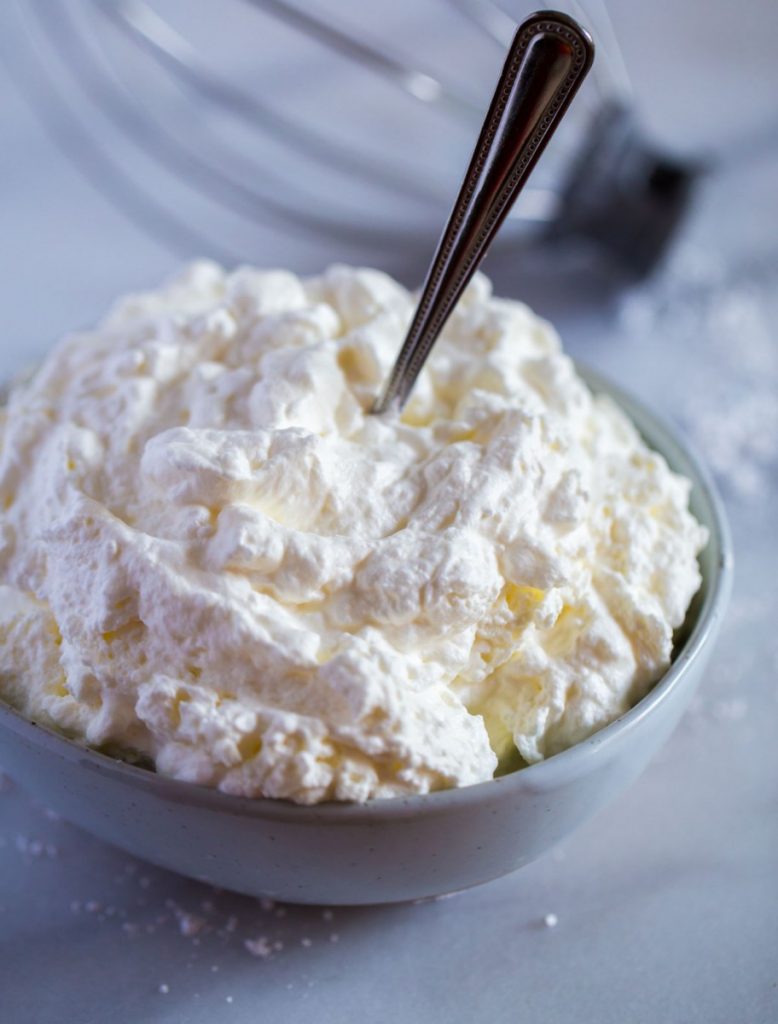
Begin by making the Oreo cookie crust. Bake it at 350 degrees for 10 minutes. Allow the crust to cool down completely. You’ll find the recipe and instructions for it here. Put a stainless steel mixing bowl and whip into the freezer. Later we’ll be making homemade whipped cream, and you’ll want to have these kitchen tools nice and cold. You’ll find step-by-step instructions for making homemade whipped cream here.
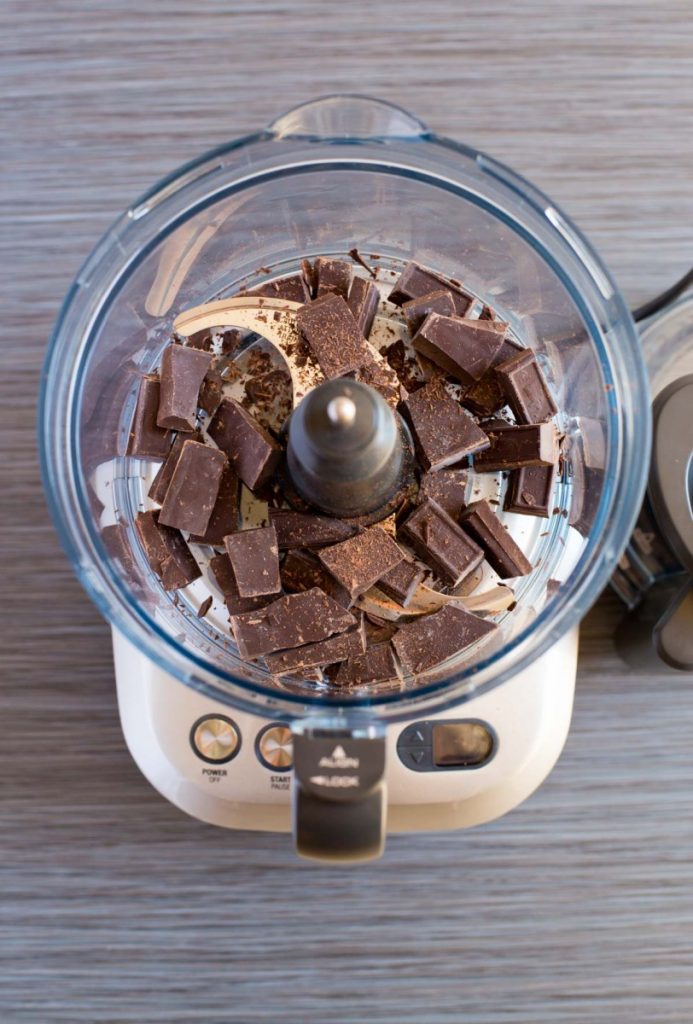
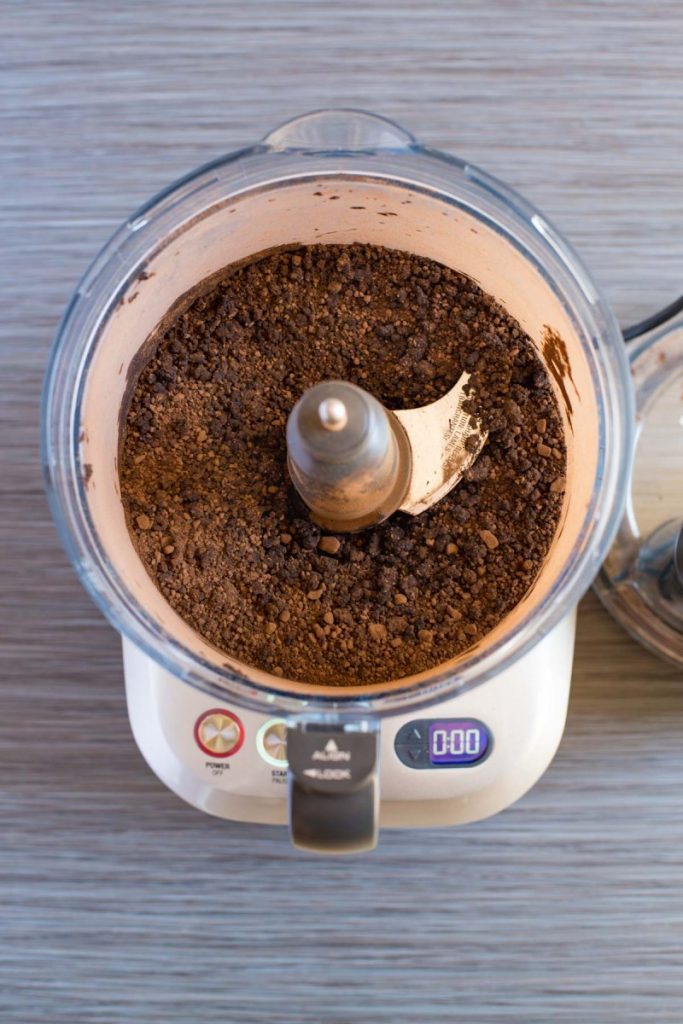
Roughly chop or snap off pieces of semi-sweet chocolate squares and add them to the bowl of your food processor. For a great chocolate mousse pie it’s important to use high-quality baking chocolate. Today I used Baker’s semi-sweet chocolate, but other times I use Ghirardelli semi-sweet chocolate. Both of these brands are widely available here in California and produce excellent baking chocolate. The specific brand I use just depends on what I have in my pantry when I’m getting ready to make a recipe.

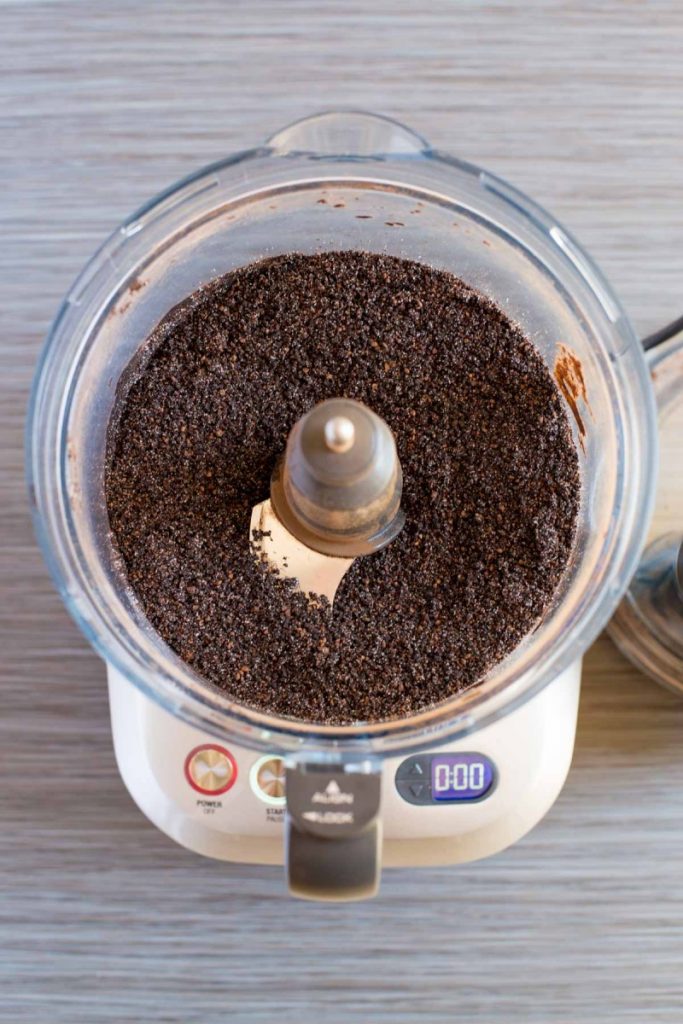
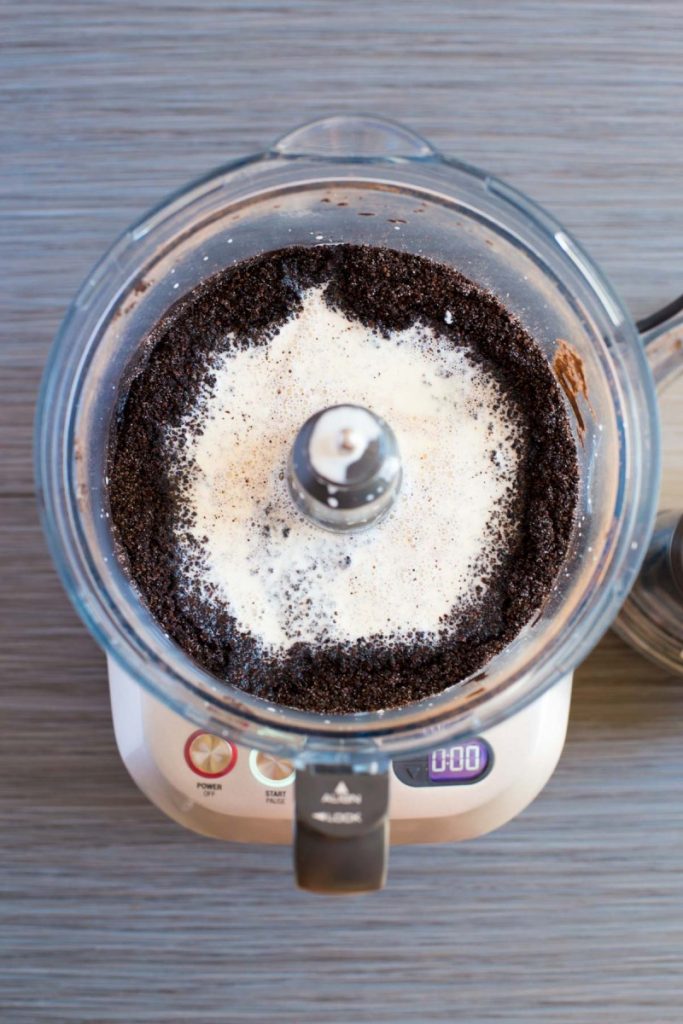
Pulse until the semi-sweet chocolate is finely ground.
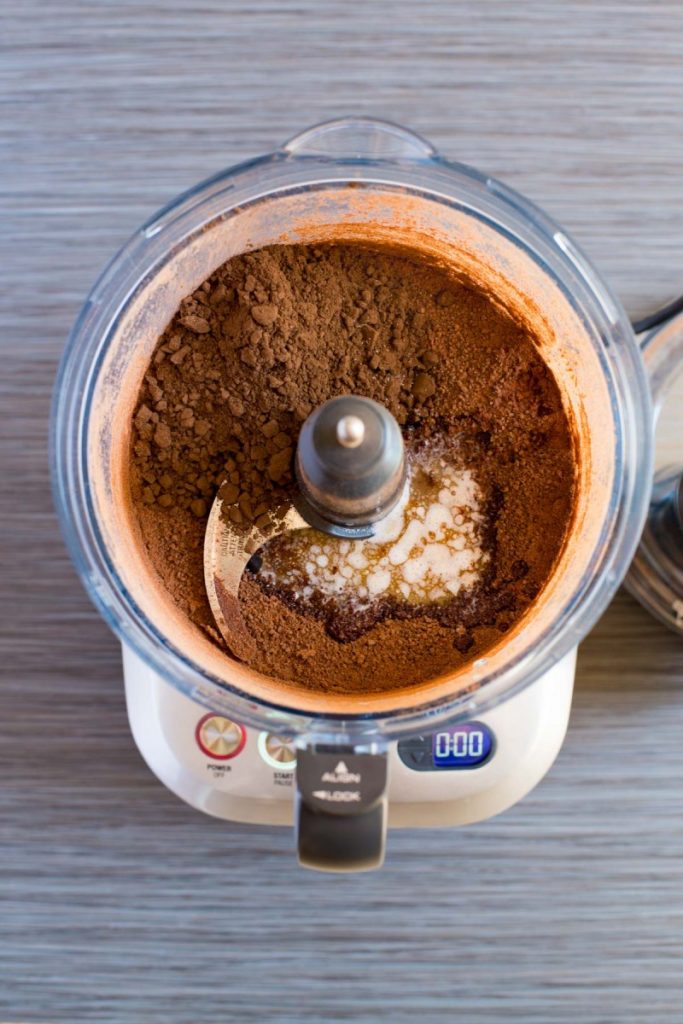
Add in Hershey’s Cocoa (I use the type labeled Special Dark), melted butter, vanilla, and a pinch of salt.
Pulse again to combine the ingredients. The texture should be that of coarse meal.
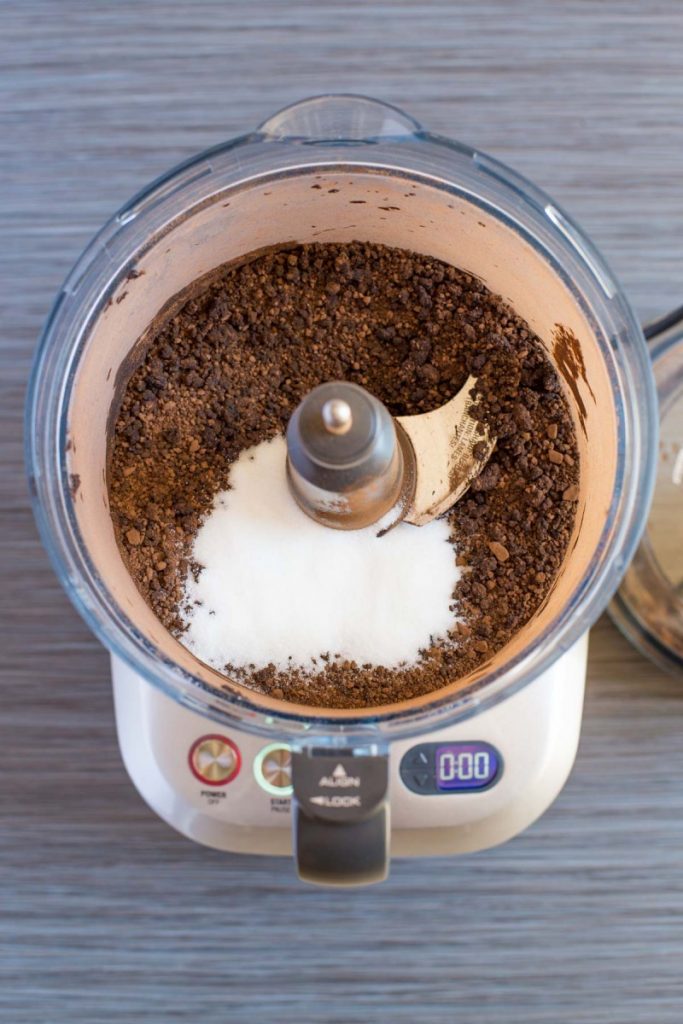
Add granulated sugar to the bowl.
Pulse again to incorporate the sugar into the chocolate mixture.
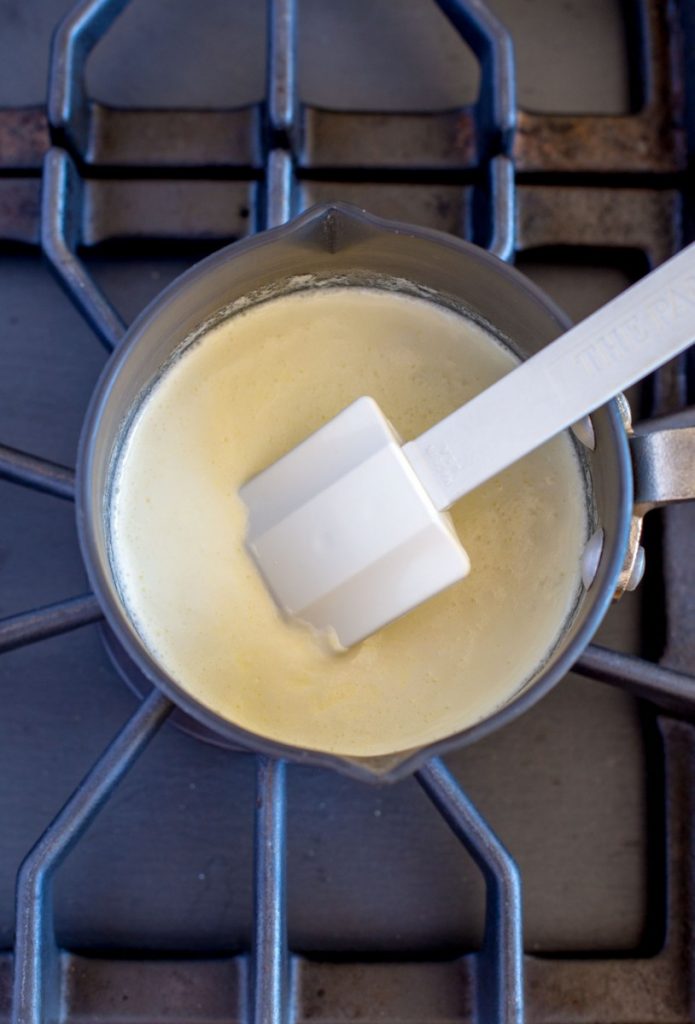
On your stovetop bring one cup of heavy whipping cream to a light boil over medium-low heat. If you have a small, heavy pan with a pouring spout – that’s the perfect pan to use. As the cream heats up, gently stir it with a spatula. As soon as you see very small bubbles forming on the surface, remove your pan from the heat. The cream should not be scalding hot – it should just be hot enough to melt the chocolate mixture.
Pour the heavy whipping cream right on top of the chocolate mixture that’s within the bowl of the food processor. The chocolate will immediately start to melt.
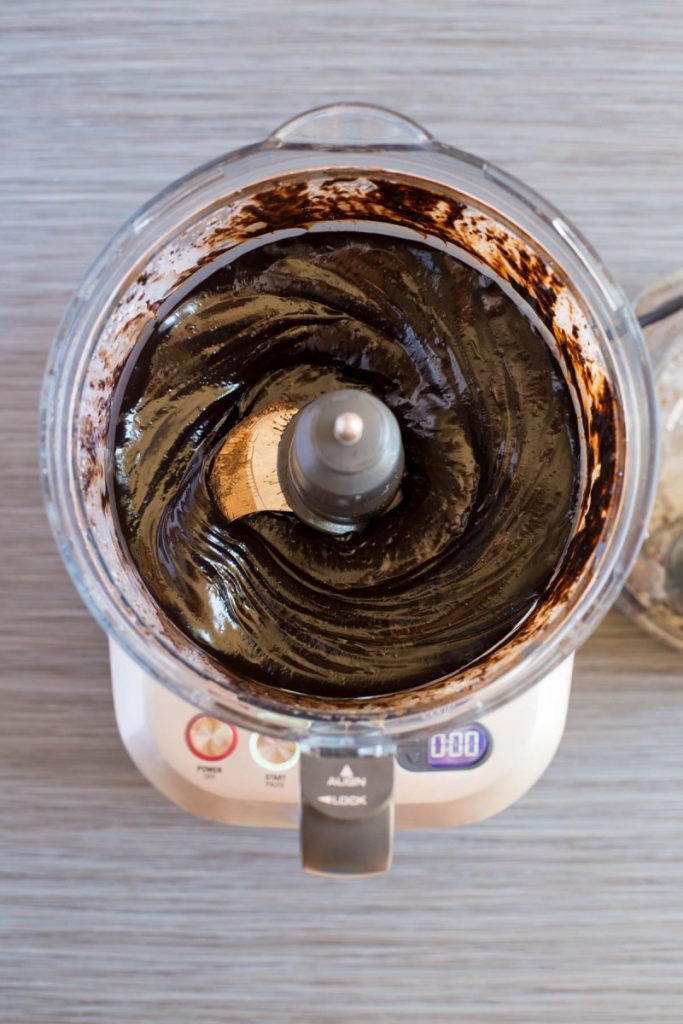
Pulse briefly until the heavy cream has been fully incorporated into the chocolate mixture AND the chocolate has completely melted. Your mixture will have a thick, rich, chocolatey fudge consistency. It will also be very warm. Allow the chocolate mixture to cool all the way down to room temperature. This is very important.
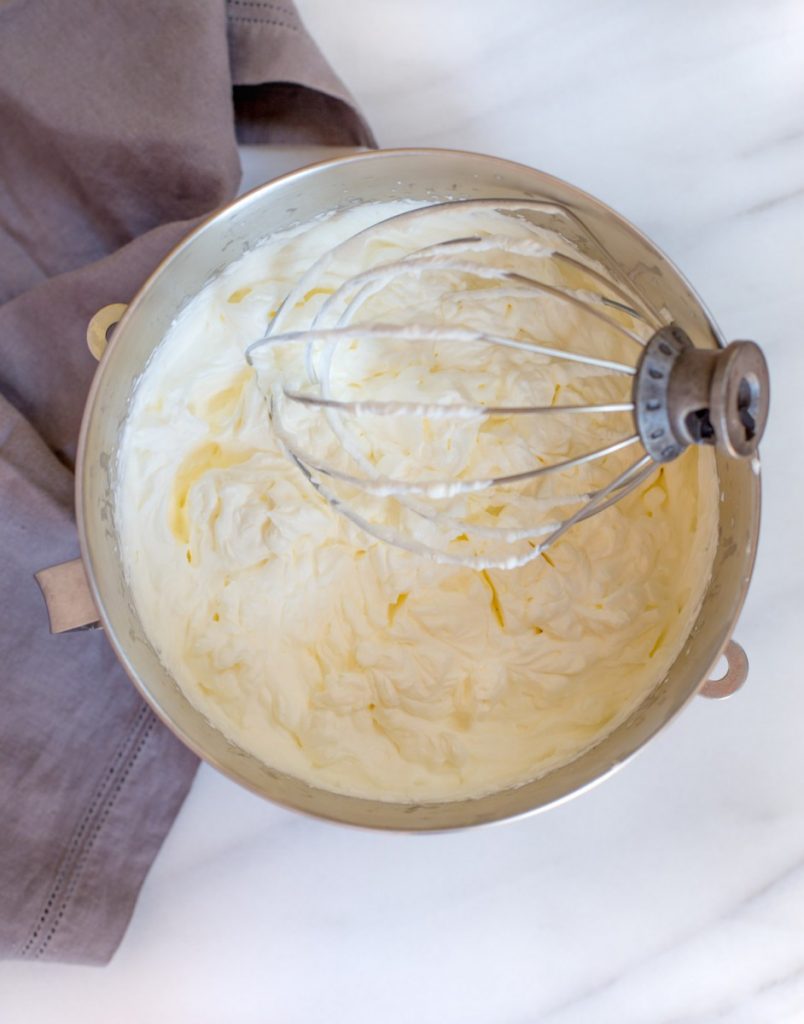
In the meantime, pull out your mixing bowl and whip from the freezer. They should be nice and frosty cold. It’s time to make the homemade whipped cream using 4 cups of heavy whipping cream, 4 tablespoons of powdered sugar (confectioner’s sugar) and one tablespoon of pure Mexican vanilla (or vanilla extract).
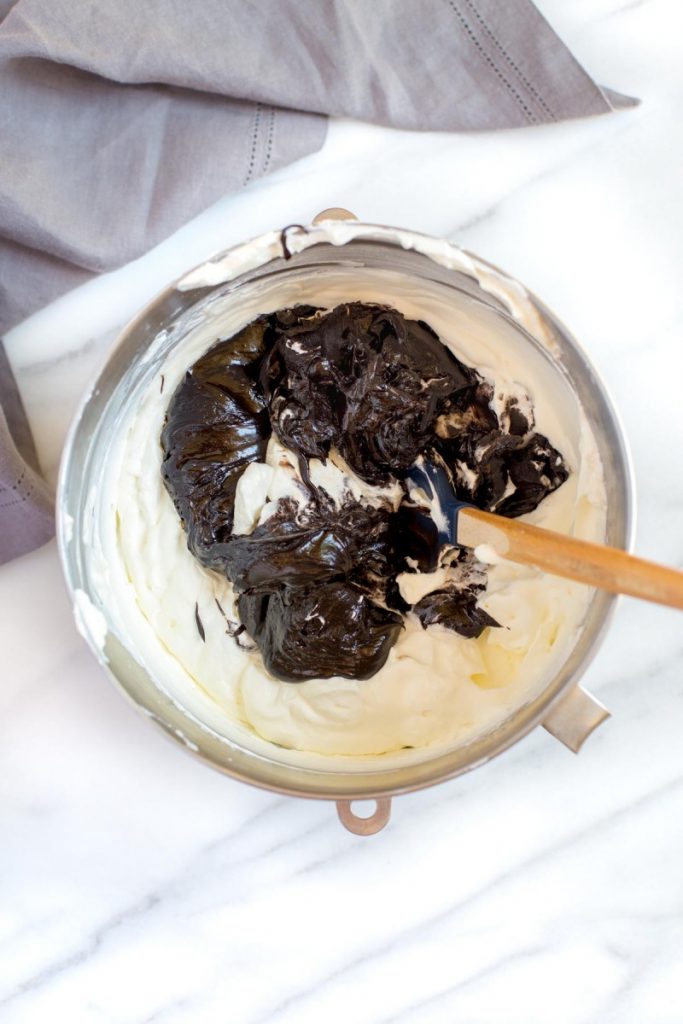
After you’ve created the homemade whipped cream, transfer half of the batch to a separate bowl. Store both bowls of whipped cream in the refrigerator as you continue to wait for the chocolate mixture inside the food processor to cool down. If there’s room in the fridge, you can speed up the process by sticking the food processor bowl with the chocolate into the refrigerator for about 10 minutes, but no longer. If the chocolate gets cold rather than just cooled to room temperature, it will be super thick and difficult to mix into the whipped cream. Once the chocolate mixture sheds its heat, transfer it to the large mixing bowl that still has half of the batch of whipped cream.
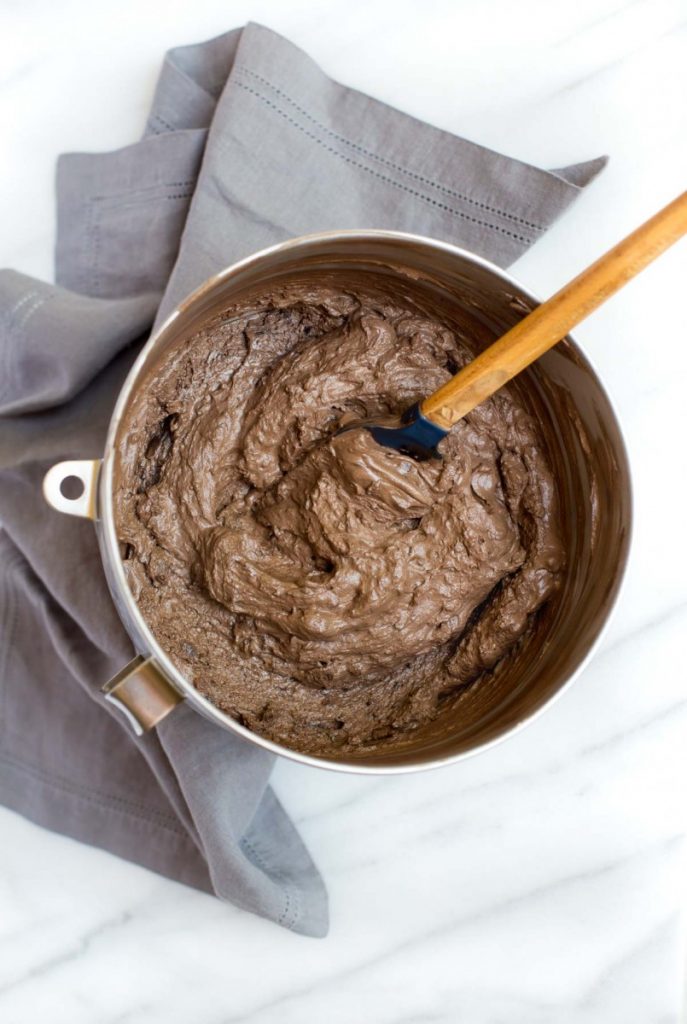
With a spatula, gently fold the chocolate mixture into the whipped cream. Don’t over mix. It’s perfectly okay to have bits of chocolate and streaks throughout the completed chocolate mousse mixture.
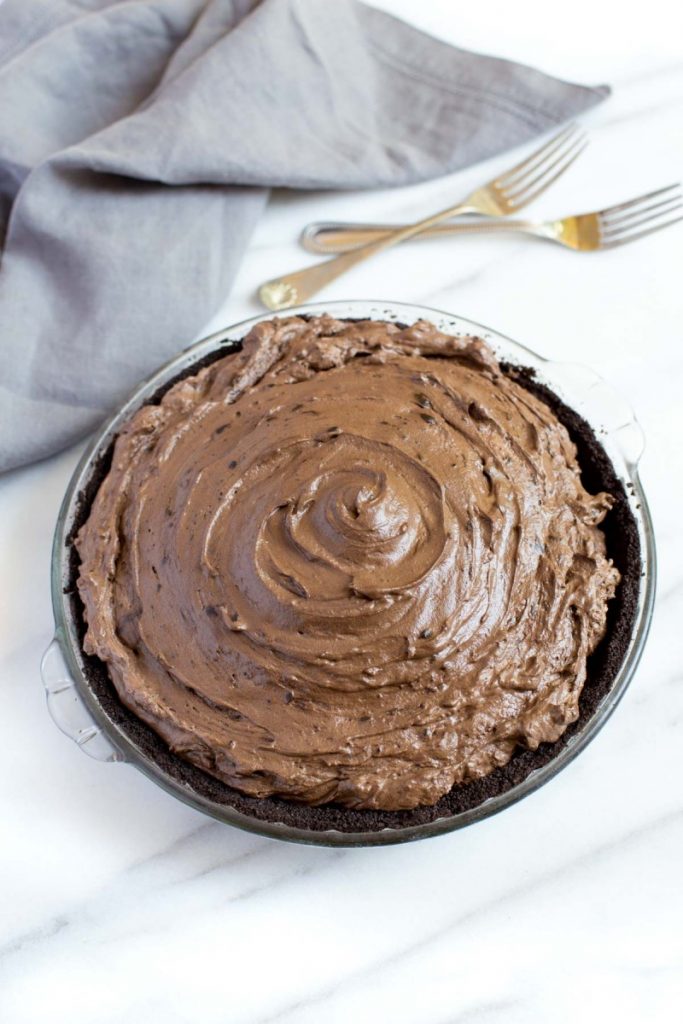
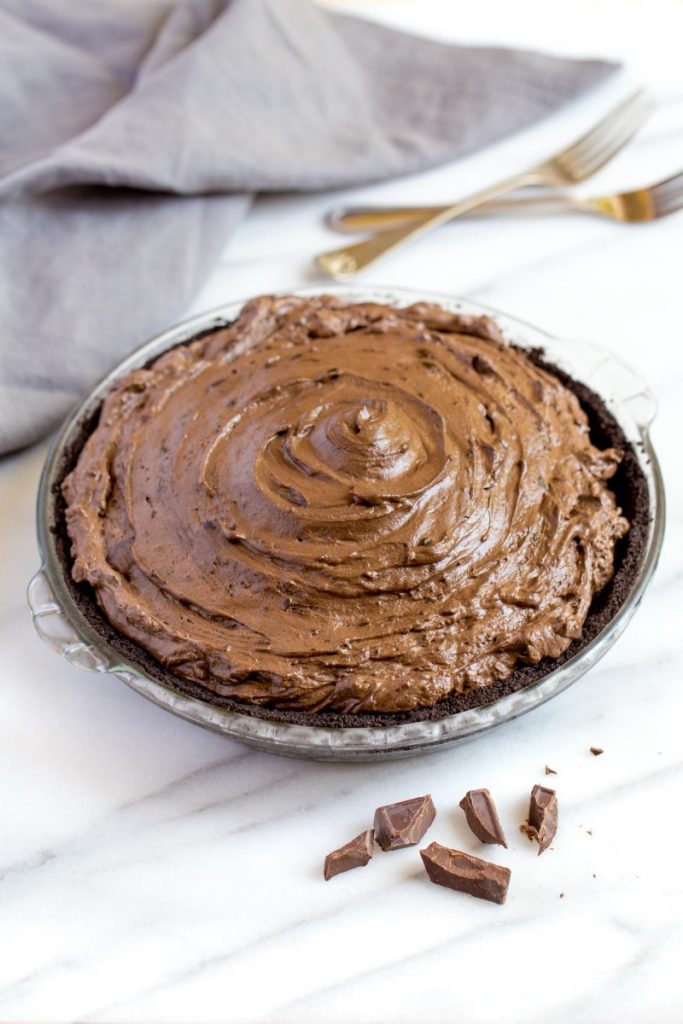
With a spatula transfer the chocolate mousse to the Oreo cookie pie crust.
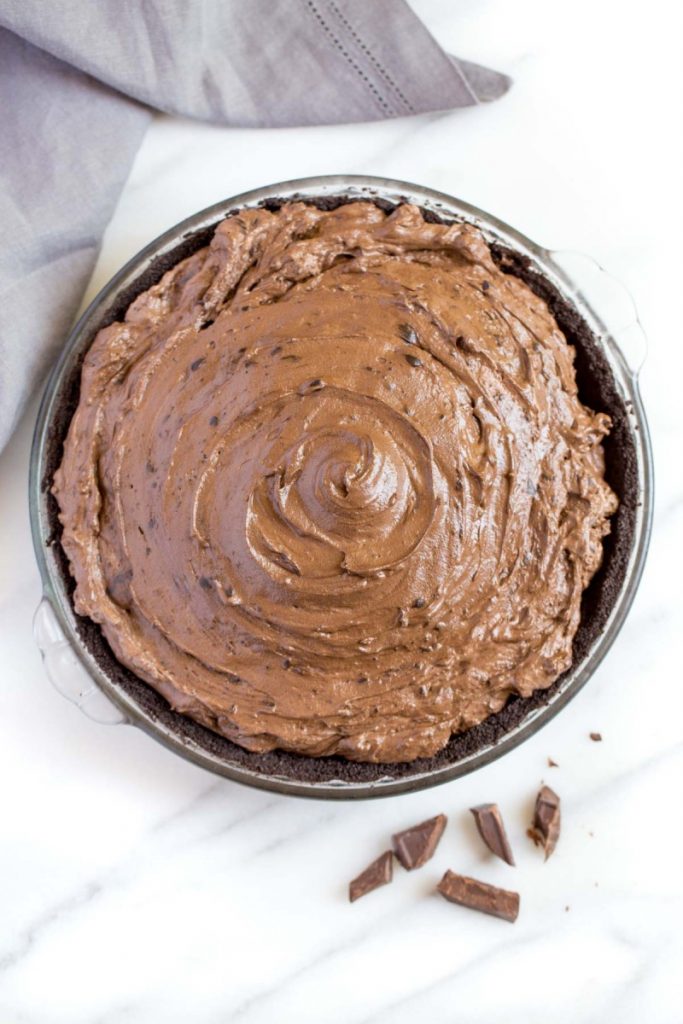
Rather than level out the chocolate mousse within the crust, instead swirl your spatula over the chocolate mousse pie and bring it to gentle peak in the center.
Ahhh…take a small step back and admire your delicious chocolate mousse pie. Beautiful! Go ahead and lick the spatula – there’s time – and I know you’ve been waiting to do this. Mmmm…
Alrighty. Go back to your fridge and pull out the other bowl of whipped cream. With a clean spatula and very light swirling motions and strokes, top off the chocolate mousse pie with the whipped cream.
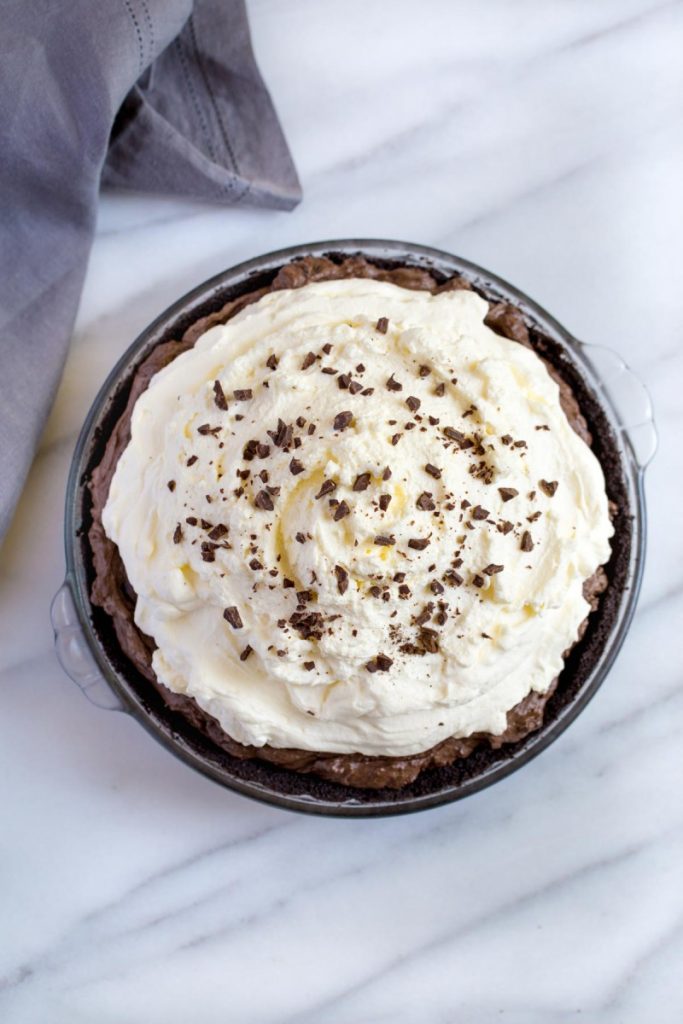
Sprinkle the top of the chocolate mousse pie with finely chopped pieces of semi-sweet chocolate.
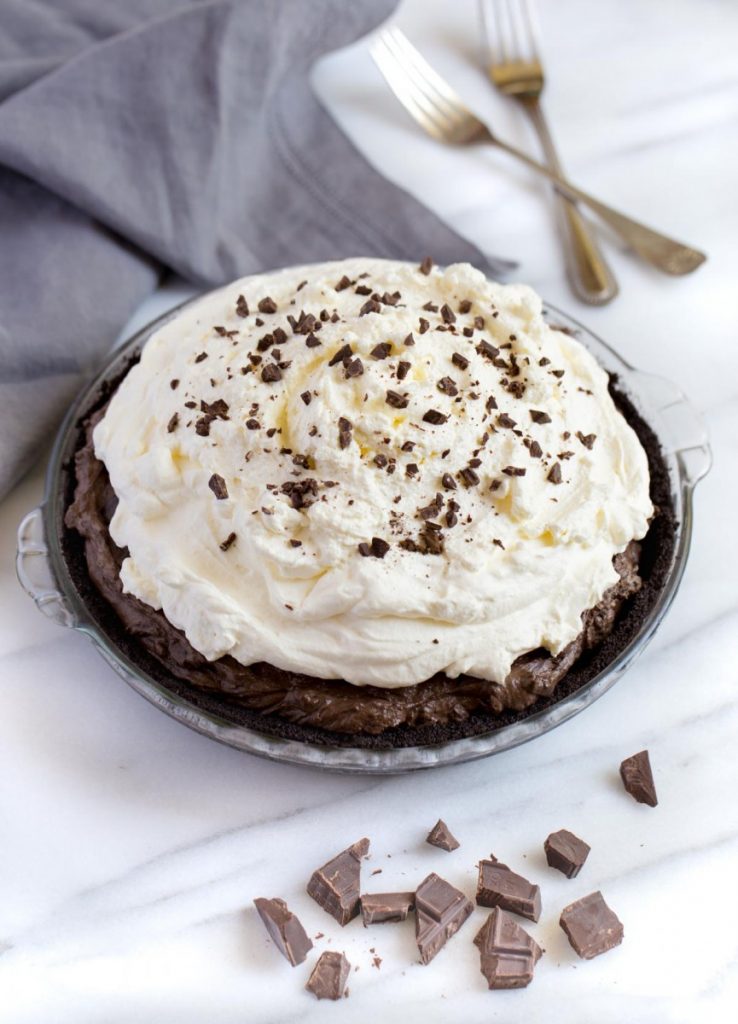
Refrigerate the chocolate mousse pie for 5-6 hours, or overnight, so that it firms up nicely and will be ready to slice. The thick, rich consistency of the cold pie with it’s Oreo cookie crust will be absolutely wonderful!
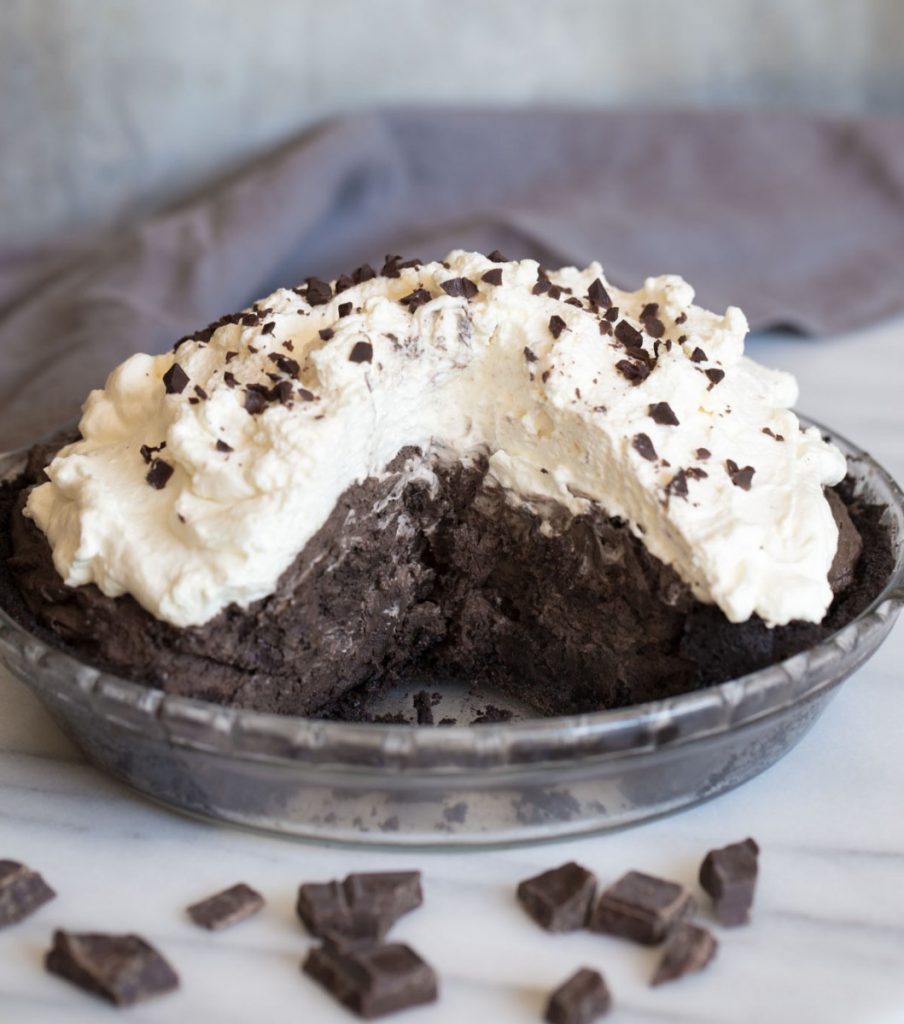
Who will get the first piece of your decadent chocolate mousse pie? My husband and our daughter Ashley got the first two pieces of the one you see here. Scrumptious! If there’s any pie left after serving, return it to the refrigerator.
A homemade chocolate mousse pie is perfect for summer BBQs, potlucks and birthdays. It’s also a very popular pie during the holidays! Easter, Thanksgiving and Christmas just wouldn’t be the same without a whole host of delicious desserts to include this fabulous chocolate mousse pie. Pick an image from this post and pin it to Pinterest so you won’t have to go searching for this heavenly recipe when you’re having chocolate cravings. When it comes time to make special holiday desserts I know you’ll be thinking of this rich, thick chocolate mousse pie.
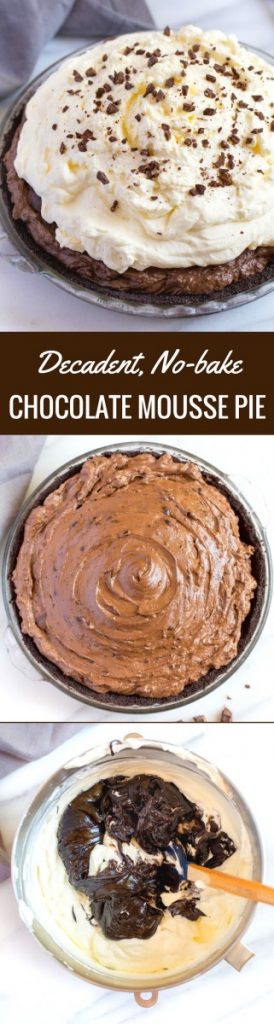
How to Make Chocolate Mousse Pie > Shop This Post
Great kitchen tools help you get the job done quicker and more efficiently. I’m loving my Breville Sous Chef food processor! I’m so glad I dug in and did plenty of research before making my purchase. If you’ve been considering buying a food processor for the very first time or replacing an old one, this brand and model are one of the best.

![]()

![]()

![]()

![]()
![]()
Want to Save This Recipe?
Enter your email below and we’ll send the recipe straight to your inbox! 👩🏻🍳 Plus you’ll receive a few new recipes weekly.
* By submitting this form, you consent to receive emails from Confetti and Bliss.

Chocolate Mousse Pie
- Total Time: 25 minutes
- Yield: 8 servings 1x
Description
The chocolate mousse pie recipe I’m sharing with you today has a delicious Oreo cookie crust. It’s filled with a glorious chocolate mousse and topped with homemade whipped cream and a sprinkling of chopped semi-sweet chocolate.
Ingredients
INGREDIENTS – OREO COOKIE CRUST
- 28 whole Oreo cookies, crushed to crumbs
- 6 + 1/2 tablespoons salted butter, melted
INGREDIENTS – HOMEMADE WHIPPED CREAM
- 4 cups heavy whipping cream
- 4 tablespoons powdered sugar (confectioners sugar)
- 1 tablespoon pure Mexican vanilla (or vanilla extract)
INGREDIENTS – CHOCOLATE MOUSSE
- 8 ounces semi-sweet chocolate, roughly chopped
- 3/4 cup Hershey’s Cocoa – Special Dark
- 4 tablespoons unsalted butter, melted
- 2 teaspoons pure Mexican vanilla (or vanilla extract)
- 1 pinch of salt
- 1/4 cup granulated sugar
- 1 cup heavy whipping cream, lightly boiled
- 1 batch of whipped cream (made from the whipped cream ingredients above), divided
- Optional garnish: semi-sweet chocolate, finely chopped for sprinkling
Instructions
PREPARATION
Put a stainless steel mixing bowl and wire whip into the freezer to chill. Later these cold kitchen tools will be used to make homemade whipped cream.
MAKE THE OREO COOKIE CRUST
- Add the Oreo cookies and melted butter to the bowl of a food processor. Pulse until the cookies are reduced to fine crumbs.
- With a spatula, transfer the cookie crumb mixture to a 9- or 10-inch pie dish. Spread the mixture evenly on the bottom and sides of the pie dish. Press down firmly with your spatula to compact the Oreo cookie crust.
- Bake the crust for 10 minutes at 350 degrees. Remove the pie dish from the oven and allow the Oreo cookie crust to cool completely before adding the filling.
MAKE THE WHIPPED CREAM
- Remove the stainless steel bowl and wire whip from the freezer.
- Add 4 cups heavy whipping cream, powdered sugar and vanilla to the mixing bowl.
- Starting with a low speed, begin whisking the ingredients. Gradually increase the speed higher and higher. Whip until soft peaks begin to form. This usually takes about three minutes or so. Keep a close eye on the bowl as it’s important to not over whip the mixture. If it’s over whipped your homemade whipping cream will fall flat.
- Keep half the whipped cream in the mixing bowl. Transfer the other half to a different bowl.
- Refrigerate both bowls of whipped cream.
MAKE THE CHOCOLATE MOUSSE
- Put the chopped semi-sweet chocolate into the bowl of a food processor. Pulse until the chocolate has been reduced to powder. Add the cocoa, melted butter, vanilla, pinch of salt and granulated sugar to the food processor. Pulse until all the ingredients are combined and the mixture resembles coarse meal.
- In a small heavy saucepan with a spout, heat one cup of heavy whipping cream over medium-low heat. Gently stir with a heat-safe silicone spatula until very small bubbles appear on the surface. Immediately remove the pan from heat. Do not bring the cream to a full boil.
- Add the cream to the food processor. Pulse until the cream is completely incorporated AND the chocolate has melted. The result will be a thick, rich, dark, chocolate fudge. Allow the mixture to sit and cool down completely to room temperature. This is very important!
- Once the chocolate mixture is no longer warm, pull out the large mixing bowl from the refrigerator. This mixing bowl has just one half of the whipped cream you created above. With a spatula, transfer the chocolate mixture from the bowl of the food processor to the mixing bowl with the whipped cream. Gently fold the chocolate mixture into the whipped cream. Do not over mix. It’s perfectly fine for the chocolate mousse to have visible bits of chocolate and streaks.
- With a spatula, transfer the chocolate mousse to the Oreo pie crust. Gently spread the mousse within the crust so that it gradually heightens and peaks in the very middle.
- Grab the remaining bowl of whipped cream from the refrigerator. With a clean spatula gently spread the whipped cream over the top of the chocolate mousse pie. Optional garnish: Sprinkle finely-chopped semi-sweet chocolate on top of the whipped cream.
- Refrigerate the chocolate mousse pie for 5-6 hours, or overnight.
- Prep Time: 20 minutes
- Cook Time: 5 minutes
- Category: Dessert, Holiday Party
- Method: Oven
- Cuisine: American, French
![]()
?PIN IT TO PINTEREST
❤️OTHER RECIPES YOU’LL LOVE
OREO COOKIE CRUST
HOMEMADE WHIPPED CREAM
CLASSIC PEANUT BUTTER COOKIES

![]()
How to Make Chocolate Mousse Pie > Your Thoughts
Are you a chocolate lover? What are your must-have pies for the holiday season? Which family member would love this chocolate mousse pie the most? You’re invited to join the conversation in the comment section below.


I love that dessert. Anything chocolate makes a good one. Maybe I should try this one for my daugter’s upcoming birthday.
This pie looks absolutely incredible. You do such a good job showing step by step instructions with your great photos!
This cake is yummy! I’ll make it for my birthday soon :)
Yum! I am such a chocolate fanatic but I’ve never tried making a mousse pie. It looks incredible! I also love the step by step photos!
This looks like it’s perfectly made. I’ve never made a chocolate anything so you did this so well.
You have me at mousse pie! I love a good tasty chocolate mousse and this one is right up my alley. I love recipe that doesn’t require eggs but still taste good. I’m not good at baking but this recicpe I want to try making.
This looks so yummy, and you made it so easy to follow! Thanks for sharing your recipe :)
Even though I am not a fan of oreos I do love a good chocolate mousse and this pie looks absolutely adorable and love the step by step I can recreate for my man.
I love Chocolate pie and this looks delicious. Thanks for sharing the recipes and I want to make this asap.
That looks so good!! I haven’t had chocolate mousse pie in awhile! Definitely a recipe I am going to have to try out! Thanks for sharing!
I am always looking for new dessert recipes to try. I will have to get the ingredients I need to make this on the weekend. It looks so delicious and easy to make.
Oh, it looks so delicious! I love chocolate mousse pie but I find it hard to make one. I want to try your recipe, it seems easier than what I have.
This looks AMAZING! Need to make ASAP! What a delicious dessert!
Delicious recipe & super simple to make!
I do not have time, but with your simple recipe I think I will do it. Thanks for sharing. Love
I would pig out on this, I won’t lie. I love all things chocolate, and this pie looks so scrumptious.
Wow that looks sooo yummm :D… I wanna have it right away :) I am definitely gonna try this recipe
If I hadn’t just come in from mowing the lawn in 90 degree heat with 90% humidty, I would be on my way to the store to buy the ingredients. This looks so good. I can’t wait to give the recipe a try
This looks unbelievably yummy and decadent. I LOVE my Kitchen Aid mixer
Oh my goodness, this sounds absolutely delicious, I totally could pop a spoon into it right now and take a huge scoop! I’ll have to pin it to make later.
Oh em gee this looks amazing! That chocolate mousse is a must-try! Definitely saving this for a weekend treat! :)
OMG! This is making my day! It looks so good! I am always afraid mousse by itself is too sweet but with oreo it must be divine!
Wow this looks like such a delicious and decadent treat! I love simple recipes that don’t need candy thermometers or anything like that!
This is my kind of dessert!! Looks incredible!! YUM!!!
Chocolate mousse pie sounds so delicious right now!
So the Marie calenders pie is my favorite on earth but this ones amazing! I have to try it!
This looks great. I have made a similar one with Reese’s cups and it was a big hit!
I am totally drooling over here. Chocolate mousse is one of my all time favorites.
It seems very simple to make! i’d love to try it at home in my own kitchen, i love chocolate. Thank you!