Shortbread Crust
This post may contain affiliate links. Read full disclosure.
This shortbread crust is tender, buttery, and irresistibly flaky. It has the ideal amount of sweetness. When it emerges from the oven, all golden and fragrant, it’s ready to cradle your favorite fillings. Use it for a classic fruit pie, a creamy custard creation, cookie bars, tarts, or a decadent chocolate indulgence.


👩🏻🍳 Why This Recipe’s a Keeper
- Versatile Crust: This is a quick easy recipe for a shortbread crust that is ideal for pies, tarts, cookie bars, and cheesecakes. There’s enough dough to fit a 9-inch round pie plate, or square 8×8-inch or 9×9-inch pans.
- Irresistible Texture: It’s perfectly flaky yet holds together beautifully, providing the ideal base for any pie filling.
- Delicate Flavor: The subtle sweetness of the shortbread crust enhances the flavors of the pie filling without overpowering them. It allows the natural taste of the filling’s ingredients to shine through.
- Homemade Goodness: There’s something very special about a homemade pie crust. The lovely look and delicious taste, in addition to all the love that goes into it. There’s timeless appeal and satisfaction in making it from scratch.
- Ease of Preparation: With just a handful of simple ingredients and easy instructions, this recipe can be successfully made by both new and experienced bakers alike. You’re ensured recipe success with minimal effort.
- Make-Ahead Option: This shortbread pie crust can be prepared in advance and stored in the fridge (for up to 2 days) or freezer (up to 1 month) until ready to use. This allows for convenient meal planning and stress-free entertaining.

🛒 Ingredients
- All-Purpose Flour: Provides structure and stability for the crust. It contributes to the crumbly texture characteristic of shortbread.
- Powdered Sugar: Adds sweetness to the crust without creating a granular texture. It helps create a tender, melt-in-your-mouth consistency.
- Kosher Salt: Enhances the flavor of the crust by balancing the sweetness. It also helps to strengthen the gluten structure in the flour, aiding in development the perfect texture. The reason we use kosher salt rather than table salt, is that it allows better control over seasoning the dough. Its larger crystals dissolve more slowly, distributing evenly throughout the dough.
- Salted Butter: Adds richness and flavor to the crust. It creates the signature buttery taste and crumbly texture of shortbread. It incorporates layers of fat into the dough, resulting in a flaky crust when baked. For even distribution throughout the dough we chop chilled butter into tiny pieces. They should be room temperature but still cool to the touch.
- Large Egg: Acts as a binding agent, helping to hold the crust together. It also contributes to the structure and texture of the dough while adding richness and moisture to the crust.
- Pure Vanilla Extract: Contributes a warm floral flavor with a touch of sweetness. The delicious aroma of vanilla can fill your kitchen, adding to the overall experience of enjoying freshly-baked goods from scratch.
- Ice-Cold Water: Helps hydrate the dough without warming the butter, which is crucial for achieving a tender, flaky crust.

📖 Recipe Steps
Recipe Prep: Adjust oven rack to the center position. Preheat the oven to 350°F (177°C). Prepare a round 9-inch pie dish (or 8×8-inch pan, or 9×9-inch pan) by lightly oiling it or lining the bottom with parchment paper. You can use a stand mixer with a paddle attachment, or make this recipe by hand in a mixing bowl.
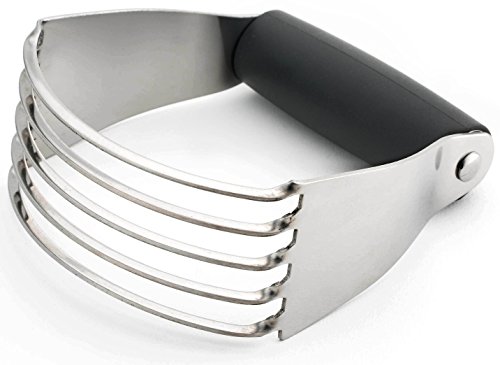
- In a large mixing bowl, combine flour, sugar and salt. Whisk or stir the dry ingredients together until well combined. Add the chopped butter to the bowl. Using your fingers or a pastry cutter, work the butter into the flour mixture until it resembles coarse crumbs. You should still have some pea-sized pieces of butter visible in the mixture.
- In a small bowl, whisk together the egg and vanilla extract. Make a well in the center of the flour-butter mixture and pour the egg mixture into the well. With damp hands, gently mix the wet and dry ingredients together. Drizzle 1 tablespoon ice-cold water over the dough and continue mixing until the dough binds together. The dough will be crumbly. But if needed, add a bit more ice-cold water. Be careful not to overwork the dough.
- Once the dough comes together and holds its shape, transfer it to a lightly-floured board. Form it into a ball, and then pat it down into a flat disc. Tightly wrap it in plastic wrap or waxed paper and chill it in the freezer for 15 minutes. Prepare your work surface by lining it with parchment paper.
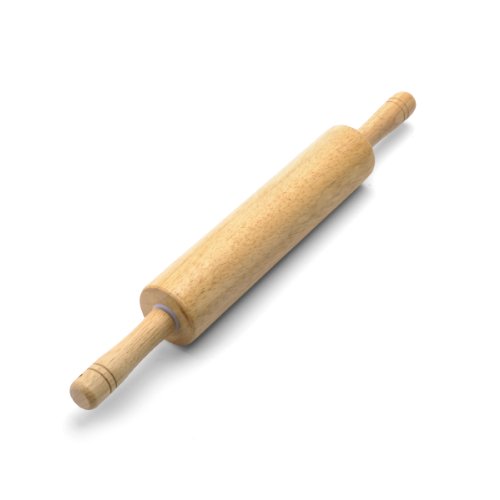
- With a rolling pin, roll out the dough into a circle slightly larger than your pie dish. Place the dish upside down over the dough. Carefully lift up the crust (slip one hand underneath the parchment paper and place the other hand on the pie dish) and flip over the dough and dish together. Gently press the dough into place. Trim off any excess dough from the edges. Prick the bottom of the crust with a fork to prevent air bubbles from forming during baking. Chill it in the freezer for 15 minutes, or in the fridge for 30 minutes.

- Line the crust with parchment paper or aluminum foil, then fill it with pie weights (or use dried beans or rice) to prevent puffing.
- If the pie filling will need to be baked after adding it to the crust, then par-bake (partially bake) the crust for about 12 to 18 minutes. Start checking the crust at the 12-minute mark. Bake just until the edges are set and starting to turn lightly golden. 👉🏻 These baking times are approximate and can vary depending on your oven and the thickness of your crust.
- If the filling added to the crust will not be baked, then make sure the crust is fully cooked. Bake it for an additional 5 to 10 minutes, or just until golden blonde and done (crisp but not too dark). Remove the pie weights and let the crust cool completely. Your shortbread pie crust is now ready to use.

Expert Tip: Allow shortbread pie crust to cool completely after parbaking before adding filling and baking further. Cooling the crust helps it firm up and prevents it from becoming soggy when filled. Additionally, it ensures the crust and filling bake evenly together.

🧑🏼🍳 Recipe FAQs

🥧 More Essential Crust Recipes
If you enjoy baking delicious quiches and desserts, you’ll want to add these essential crust recipes to your recipe arsenal to have them on hand when you need them.
Rate This Recipe ⭐️⭐️⭐️⭐️⭐️
Review by a recipe tester: “Absolutely divine! This shortbread pie crust recipe is a game-changer. Perfectly buttery, tender, and easy to make. It was pure perfection.”
If you agree this recipe’s a keeper, give it a 5-star rating in the comments. Then be a recipe hero. Share it with friends. 📌 Pin it to Pinterest.


Shortbread Pie Crust
- Total Time: 1 Hour
- Yield: 1 Crust 1x
Description
Indulge in buttery perfection with our best shortbread crust. It’s rich and crumbly with a fabulous melt-in-your-mouth texture. This simple pastry serves as a delicious foundation for a wide range of desserts like pies, tarts and bars.
Ingredients
- 1 3/4 cups all-purpose flour
- 1/3 cup powdered sugar
- 1 pinch kosher salt
- 1/2 cup (1 stick) butter, at room temperature but still cool to the touch), chopped into tiny pieces
- 1 large egg
- 1 teaspoon pure vanilla extract
- 1–2 tablespoons ice-cold water
Instructions
Recipe Prep: Adjust oven rack to the center position. Preheat the oven to 350°F (177°C). Prepare a round 9-inch pie dish (or 8×8-inch pan, or 9×9-inch pan) by lightly oiling it or lining the bottom with parchment paper. You can use a stand mixer with paddle attachment for this recipe, or assemble the dough by hand.
- In a large mixing bowl, combine flour, sugar and salt by whisking or stirring. Add chopped butter to the bowl. Using your fingers or a pastry cutter, work the butter into the flour mixture until it resembles coarse crumbs. You should still have some pea-sized pieces of butter visible in the mixture.
- In a small bowl, whisk together the egg and vanilla extract. Make a well in the center of the flour-butter mixture and pour the egg mixture into the well. With damp hands, gently mix the wet and dry ingredients together. Drizzle 1 tablespoon ice-cold water over the dough and continue mixing until the dough binds together. The dough will be crumbly. But if needed, add a bit more ice-cold water. Be careful not to overwork the dough.
- Once the dough comes together and holds its shape, transfer it to a lightly-floured surface. Form it into a ball, and then pat it down into a flat disc. Tightly wrap the dough in plastic wrap or waxed paper. Chill it in the freezer for 15 minutes. Prepare your work surface by lining it with parchment paper.
- With a rolling pin, roll out the dough into a circle slightly larger than the pie dish. Place the pie dish upside down directly over the dough. Carefully lift up the crust (slip one hand underneath the parchment paper and place the other hand on the dish) and flip over the dough and dish together. Gently press the dough into place. Trim off any excess dough from the edges. Prick the bottom of the crust with a fork to prevent air bubbles from forming during baking. Chill it in the freezer for 15 minutes (or in the fridge for 30 minutes).
- Line the crust with parchment paper or aluminum foil, then fill it with pie weights (or use dried beans or rice) to prevent puffing.
- If the pie filling will need to be baked after adding it to the crust, then par-bake (partially bake) the crust for about 12 to 18 minutes. Start checking the crust at the 12-minute mark. Bake just until the edges are set and starting to turn lightly golden. 👉🏻 These baking times are approximate and can vary depending on your oven and the thickness of your crust.
- If the filling added to the crust will not be baked, then make sure the crust is fully cooked. Bake it for an additional 5 to 10 minutes, or just until golden blonde and done (crisp but not too dark). Remove the pie weights and let the crust cool completely. Your shortbread pie crust is now ready to use.


Notes
Can I make this crust gluten-free? Yes, this recipe works well with a gluten-free flour blend like “Bob’s Redmill Gluten Free 1 to 1 Baking Flour.”
Can I use this recipe for a chocolate shortbread crust? Yes, just substitute 2 tablespoons of the flour for 2 tablespoons Dutch process cocoa like “Hershey’s Special Dark Cocoa.”
- Prep Time: 15 Minutes
- Chill Time: 30 Minutes
- Cook Time: 15 Minutes
- Category: Desserts
- Method: Bake
- Cuisine: American


