Mummy Halloween Pop Tarts
This post may contain affiliate links. Read full disclosure.
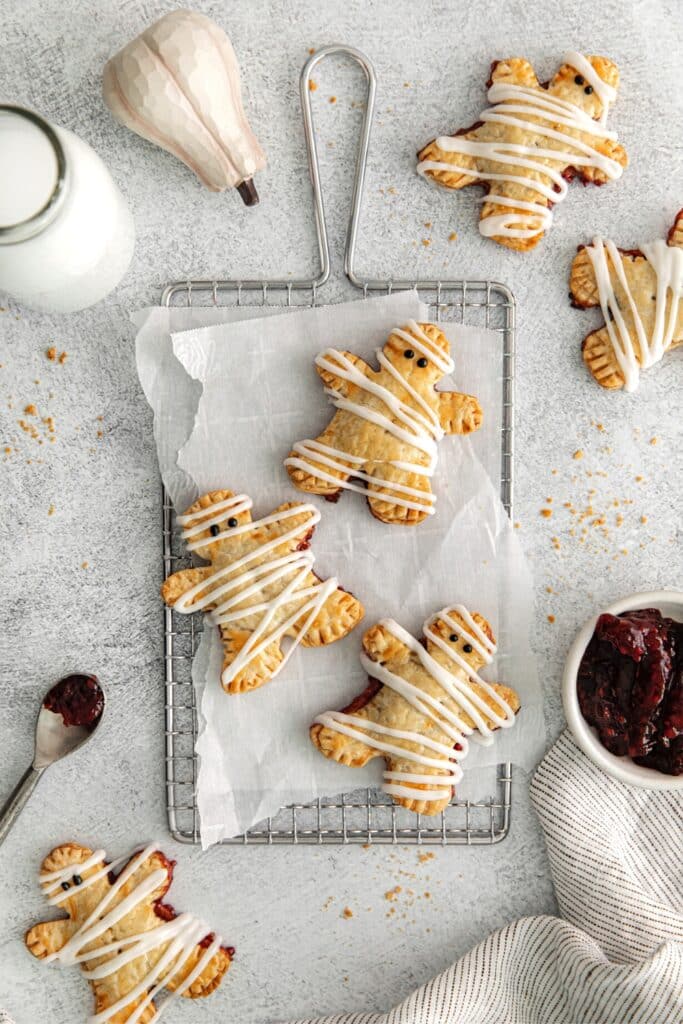
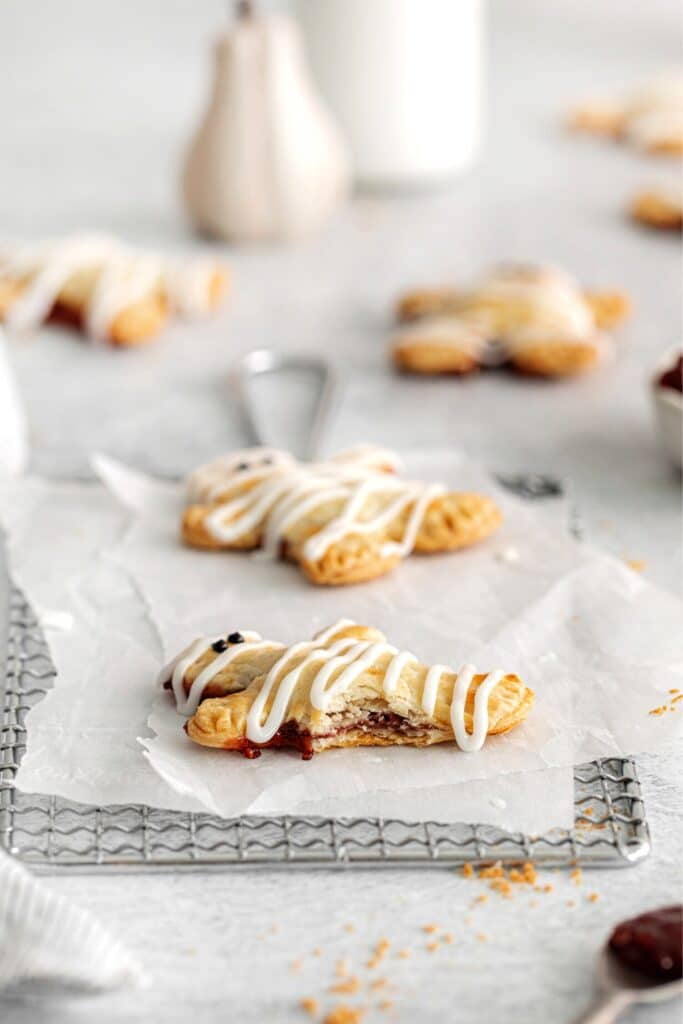
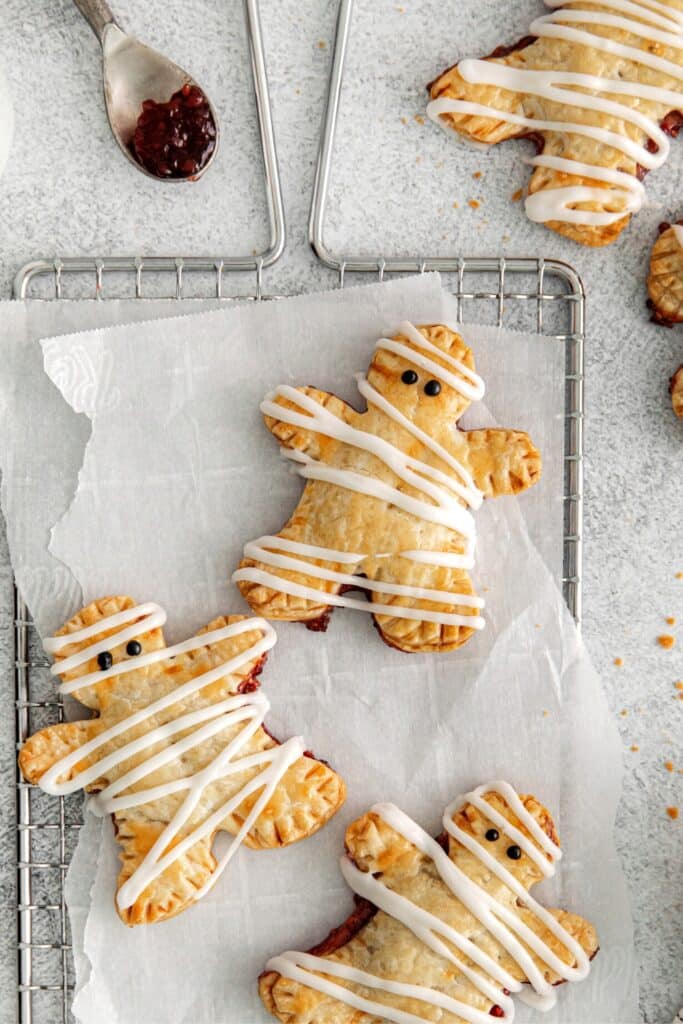
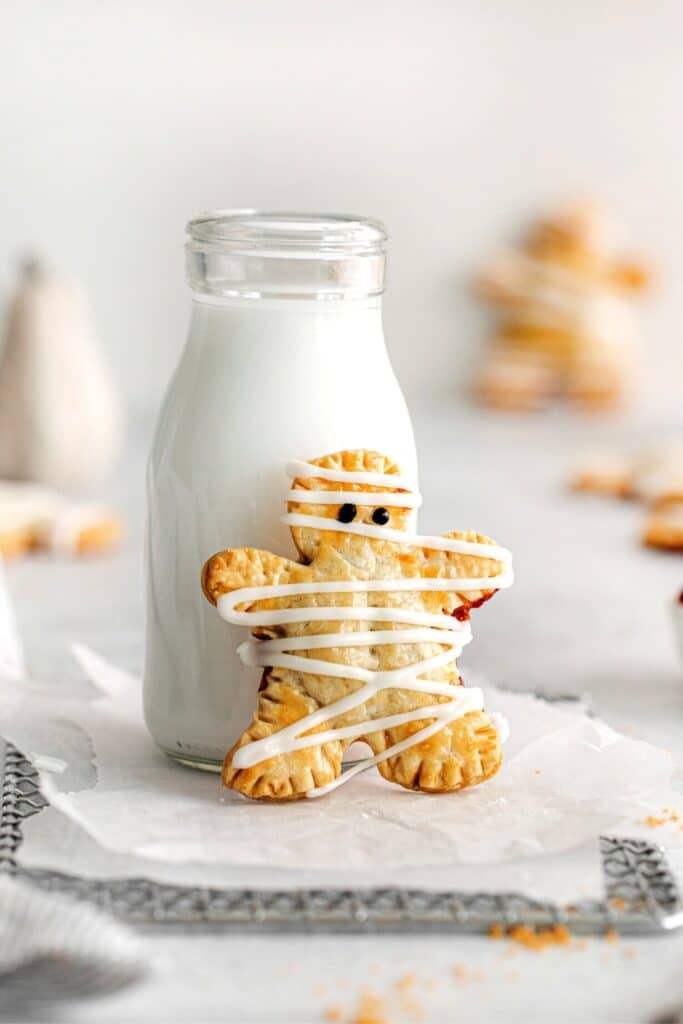
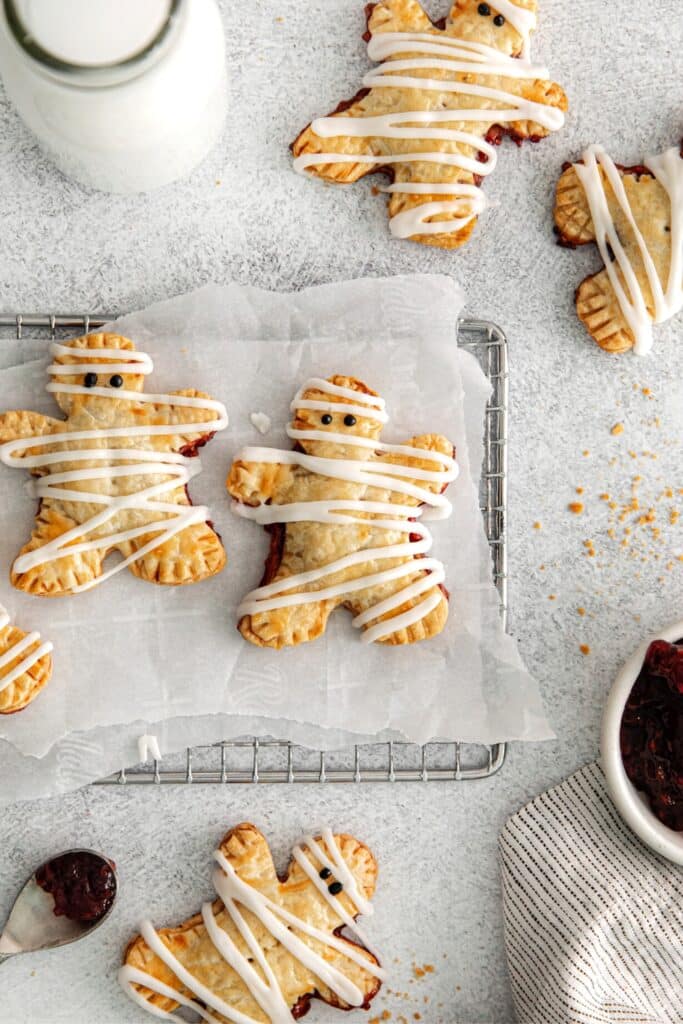
During the spooky season, Mummy Halloween pop tarts are ideal for breakfast, snacks or dessert. This simple recipe uses refrigerated or homemade pie crusts. We cut out mummy shapes, fill them with jam, and bake. Then we pipe on frosting bandages and tiny eyes.
📌 Pin Mummy Halloween Pop Tarts
🎃 Why You’ll Love This Halloween Recipe
- It’s a quick simple recipe that comes together with just 5 basic ingredients (plus candy eyes, if desired) in 25 minutes. It doesn’t get much easier than that.
- You can make the hand pies up to 2 days in advance. Assemble the toaster pastries on Sunday morning for warming and eating early in the week.
- Children can help assemble these fun Halloween pop tarts. Small ones can cut out the mummy shapes. Older children can fill and seal the toaster pastries. Everyone can decorate the mummies together. It’s a great way to create sweet memories.
- Most everyone loves baking or eating Halloween pop tarts. Especially these mummies, which are spooky and cute. Serve and enjoy them for breakfast, snack time, or dessert. Hand held pastries are perfect for on-the-go enjoyment and for Halloween party treats.
🛒 Ingredients
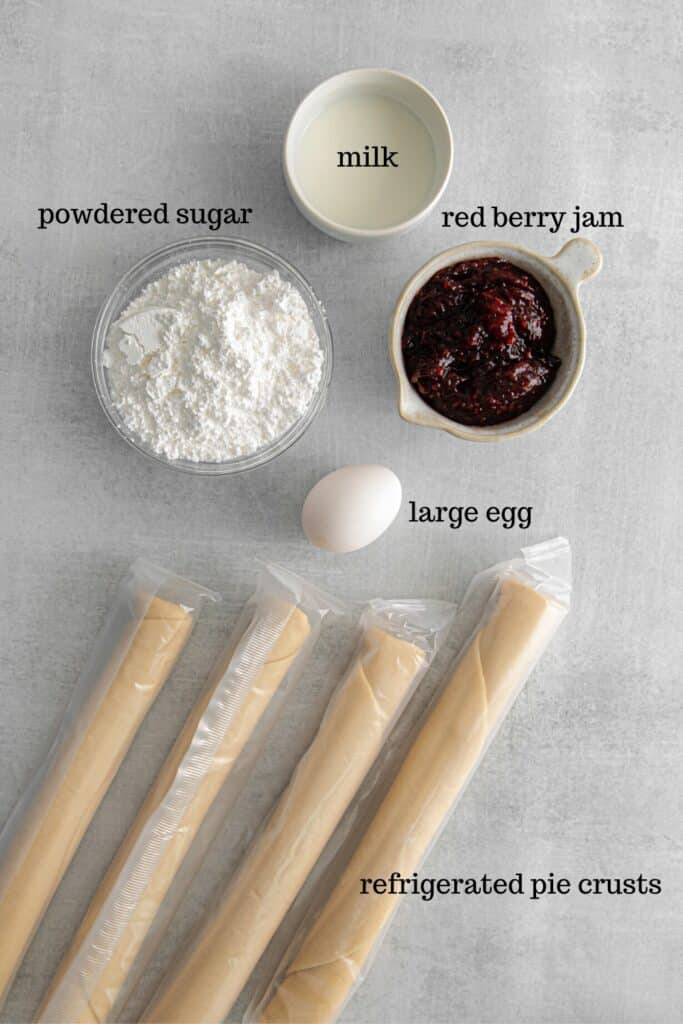
- Refrigerated Pie Crusts: Or homemade pie crusts.
- Red Berry Jam: This is my jam of choice when assembling mummy Halloween pop tarts. If a bit of red jam seeps out the sides, it looks like blood. But feel free to use your favorite flavors like strawberry, cherry, raspberry, or a combination of two different jams.
- Large Egg: We whisk it in a ramekin with a splash of water to create an egg wash for sealing the pop tarts and for brushing the tops. It helps them brown in the oven.
- Powdered Sugar: For making delicious frosting. We pipe it onto the pop tarts in a zig tag pattern to create the look of mummy bandages.
- Whole Milk: It helps thin out the frosting to the desired consistency. Feel free to use 2% milk, heavy cream, or your favorite unsweetened nut milk.
- Vanilla Extract (optional): Feel free to add a splash of vanilla (about 1/8 teaspoon) for a delicious bakery flavor and aroma.
🧑🏼🍳 Equipment Needed
- 2 Large Baking Trays: For baking the pop tarts.
- Parchment Paper: For lining the baking trays to prevent pop tarts from sticking to the pan, and to make clean-up a breeze. Especially if jam leaks out of the pop tarts.
- Cookie Cutter for Mummies, 3-inches tall: For cutting out the mummy shapes. This Amazon Associates link directs you to the exact set of cutters I used to make these Mummy Halloween pop tarts. I used the second largest size from this set.
- Piping Bags (2): For drizzling frosting across the mummies to create edible mummy bandages. If no piping bags, use zip-top bags with one bottom corner cut off.
- Black Gel Food Coloring OR Candy Eyeballs: The black food coloring is mixed with frosting to create little mummy eyes. But candy eyes can be used instead.
📖 Recipe Steps
RECIPE PREP: Preheat oven to 375°F. Line 2 large baking trays with parchment paper.
- Unroll the refrigerated pie crusts on a very lightly-floured board. With your (mummy/gingerbread man-shaped) cookie cutter, cut out 10 pieces per pie crust, for a total of 40 mummy shapes. Gather the dough scraps together into a ball. Roll the ball into a 1/8-inch thick rectangle. Cut out another 12 mummies.
- Arrange half the mummies on a lined baking sheet, leaving at least 1-inch of space between the pieces. Fill the centers with 1 to 2 teaspoons of red berry jam. Do not overfill the mummies or spread the jam out. Leave the jam as a dollop in the center.
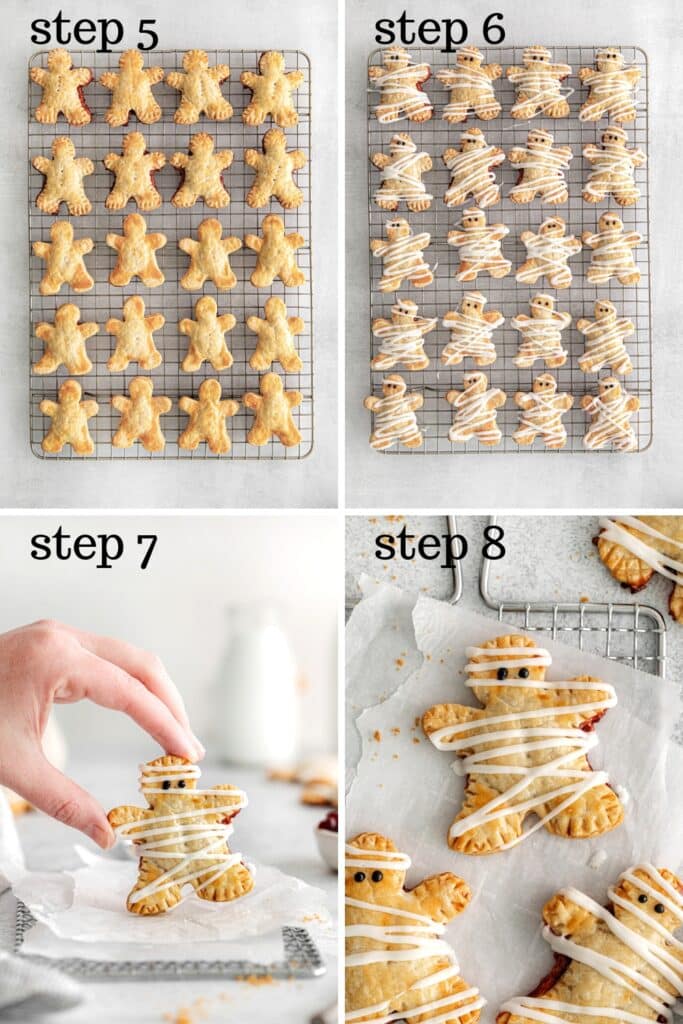
- Lightly brush the border (around the dollop of jam) with egg wash. Place another mummy cutout on top and press the edges together to seal in the jam. As long as the seams are pinched well to seal in the filling, crimping with a fork is not required. (I’ve prepped them both ways so you can view the images on the cooling rack and decide how you’d like to do yours. The mummies with crimped edges do look a little more spooky.)
- Brush the top of each mummy with egg wash. Poke each mummy’s tummy with the tines of a fork to create a steam vent.
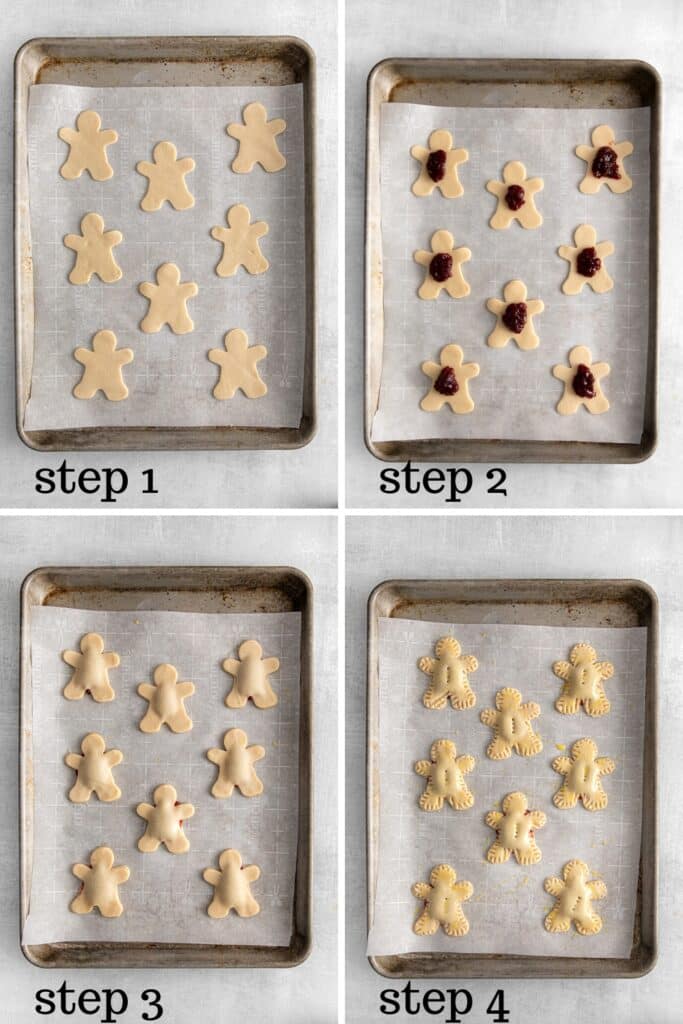
- Bake for 13 to 15 minutes, or until the mummies are golden blonde. Transfer the mummies to a cooling rack and allow them to cool completely before frosting.
- Make the frosting. In a small bowl, whisk together the powdered sugar, milk, and (optional) vanilla extract. The mixture should be thick but pipable. Transfer the frosting to a piping bag, or to a zip-top bag with one bottom corner cut off (a small hole). Drizzle frosting over each mummy to create the look of bandages.
- Make the mummy eyes: Transfer the remaining frosting to a ramekin. Add 1 drop black food coloring. Mix to combine. Transfer the mixture to a piping bag or a zip-top bag with the end cut off. Pipe 2 small eyes onto each mummy. Or if desired, use candy eyes instead, adhering them onto the mummies with tiny dollops of frosting.
- Allow the frosting to set completely (about 20 minutes), then enjoy. Store any leftover toaster pastries in an airtight container in the fridge for up to 2 days. If stacking the Halloween pop tarts within the container, place parchment paper between the layers.
👩🏻🍳 Recipe FAQ
These are the most commonly-asked questions for making the BEST mummy Halloween pop tarts, and the most helpful answers for recipe success.
After the frosting has set completely, arrange the leftover pop tarts inside a parchment paper-lined airtight container and refrigerate for up to 2 days. If you need to stack the treats, use parchment paper between the layers.
Assemble and bake the pop tarts. Make the frosting, but do not apply it. After the pastries have cooled, store them in the fridge inside an airtight container or zip-top bag. Store the frosting separately. When ready to reheat and enjoy the pop tarts, briefly rewarm in a toaster oven (do not use a slot toaster for rewarming as the jam may leak out the sides). After the toaster pastries are warm, apply the frosting per recipe instructions.
In the oven, the fat (butter) inside the cold dough will gradually melt. The steam that’s created will separate the dough into crisp flaky layers. If the dough is warm, not cold, the fat will melt quickly and the dough will cook into a hard crust without flaky layers.
⏲ Expert Tips
- You don’t need to buy a Halloween mummy cookie cutter for this recipe. Save money by repurposing a 3-inch gingerbread man cutter for the mummies. The shape is the same.
- Keep the pastry dough chilled as you are assembling the pop tarts. For pastries that are light and flaky, it’s important to start with cold dough and keep it cold as you work with it. You can do this by popping the tray of assembled (unbaked) pop tarts into the fridge while putting together the other pastries.
- Avoid overfilling the pop tarts or they’ll leak during baking. We all love jam, but no one wants to handle a messy toaster pastry. One or two teaspoons of jam is more than enough per pastry. This is an occasion when less is better.
- Do not rewarm toaster pastries in a slot toaster. The jam will ooze out the sides which can create a mess or hazard. Always warm pop tarts on a flat tray in toaster oven or conventional oven.
👻 More Sweet Halloween Treats
If you love hand pies, try these pumpkin pop tarts and apple pie pop tarts. They’re perfect recipes for the fall and Halloween season. Below are more October recipes.
- Halloween Rice Krispie Treats
- Peanut Butter Spider Cookies
- Witch Finger Cookies
- Candy Corn Fudge
- Halloween Hot Cocoa Bombs
- Halloween Sugar Cookies
👉🏻 For more sweet Halloween treats, check out our Halloween category.
Rate This Recipe ⭐️⭐️⭐️⭐️⭐️
Flavor testers rated these the BEST Halloween pop tarts. They loved the flaky tender crust and delicious jam inside. The amount of frosting for the mummy bandages was ideal – not too sweet. They greatly enjoyed the festive look of these special Halloween breakfast pastries.
If you agree this recipe’s a keeper, give it a 5-star rating in the comments. Then be a recipe hero. Share it with friends. 📌 Pin it to Pinterest.


Mummy Halloween Pop Tarts
- Total Time: 30 Minutes
- Yield: 26 Pop Tarts 1x
Description
Mummy Halloween pop tarts are ideal for breakfast, snacks or dessert during the spooky season. They’re quick and easy to make at home.
Ingredients
Mummy Halloween Pop Tarts
- 2 boxes refrigerated pie crusts (4 crusts total)
- 1/3 cup red berry jam
- 1 large egg, beaten with a splash of water
- 1 1/4 cups powdered sugar
- 1 – 2 tablespoons milk, as needed
- 1/8 teaspoon vanilla extract (optional)
Supplies
- 2 large baking trays
- Parchment paper
- 1 (3-inch tall) cookie cutter for mummies
- Piping bags (2): Or zip-top bags with one bottom corner cut off.
- Black gel food coloring OR candy eyes: The black food coloring is mixed with frosting to create little mummy eyes. But candy eyes can be used instead.
Instructions
RECIPE PREP: Preheat oven to 375°F. Line 2 large baking trays with parchment paper.
- Unroll the refrigerated pie crusts on a very lightly-floured board. With your (mummy/gingerbread man-shaped) cookie cutter, cut out 10 pieces per pie crust, for a total of 40 mummy shapes. Gather the dough scraps together into a ball. Roll the ball into a 1/8-inch thick rectangle. Cut out another 12 mummies.
- Arrange half the mummies on a lined baking sheet, leaving at least 1-inch of space between the pieces. Fill the centers with 1 to 2 teaspoons of red berry jam. Do not overfill the mummies or spread the jam out. Leave the jam as a dollop in the center.
- Lightly brush the border (around the dollop of jam) with egg wash. Place another mummy cutout on top and press the edges together to seal in the jam. As long as the seams are pinched well, crimping with a fork is optional, not required.
- Brush the top of each mummy with egg wash. Poke each mummy’s tummy with the tines of a fork to create a steam vent. Bake for 13 to 15 minutes, or until the mummies are golden blonde. Transfer the mummies to a cooling rack and allow them to cool completely before frosting.
- Make the frosting. In a small bowl, whisk together the powdered sugar, milk, and (optional) vanilla extract. The mixture should be thick but pipable. Transfer the frosting to a piping bag, or to a zip-top bag with one bottom corner cut off (a small hole). Drizzle frosting over each mummy to create the look of bandages.
- Make the mummy eyes: Transfer the remaining frosting to a ramekin. Add 1 drop black food coloring. Mix to combine. Transfer the mixture to a piping bag or a zip-top bag with the end cut off. Pipe 2 small eyes onto each mummy. Or if desired, use candy eyes instead, adhering them onto the mummies with tiny dollops of frosting.
- Allow the frosting to set completely (about 20 minutes), then enjoy. Store any leftover toaster pastries in an airtight container in the fridge for up to 2 days. If stacking the Halloween pop tarts within the container, place parchment paper between the layers.
Notes
For cutting mummy shapes: I used the second largest size cookie cutter from the set shown above (with Amazon Affiliate link). But feel free to use a different (3-inch tall) gingerbread man cutter.
- Prep Time: 15 Minutes
- Cook Time: 15 Minutes
- Category: Breakfast
- Method: Bake
- Cuisine: American

Mummy Halloween Pop Tarts 👉🏻 Join the Convo
Are you excited to make these Halloween toaster pastries? Will you share the batch with family and friends? Share your thoughts on mummy pop tarts in the comments below.


